Smart Press
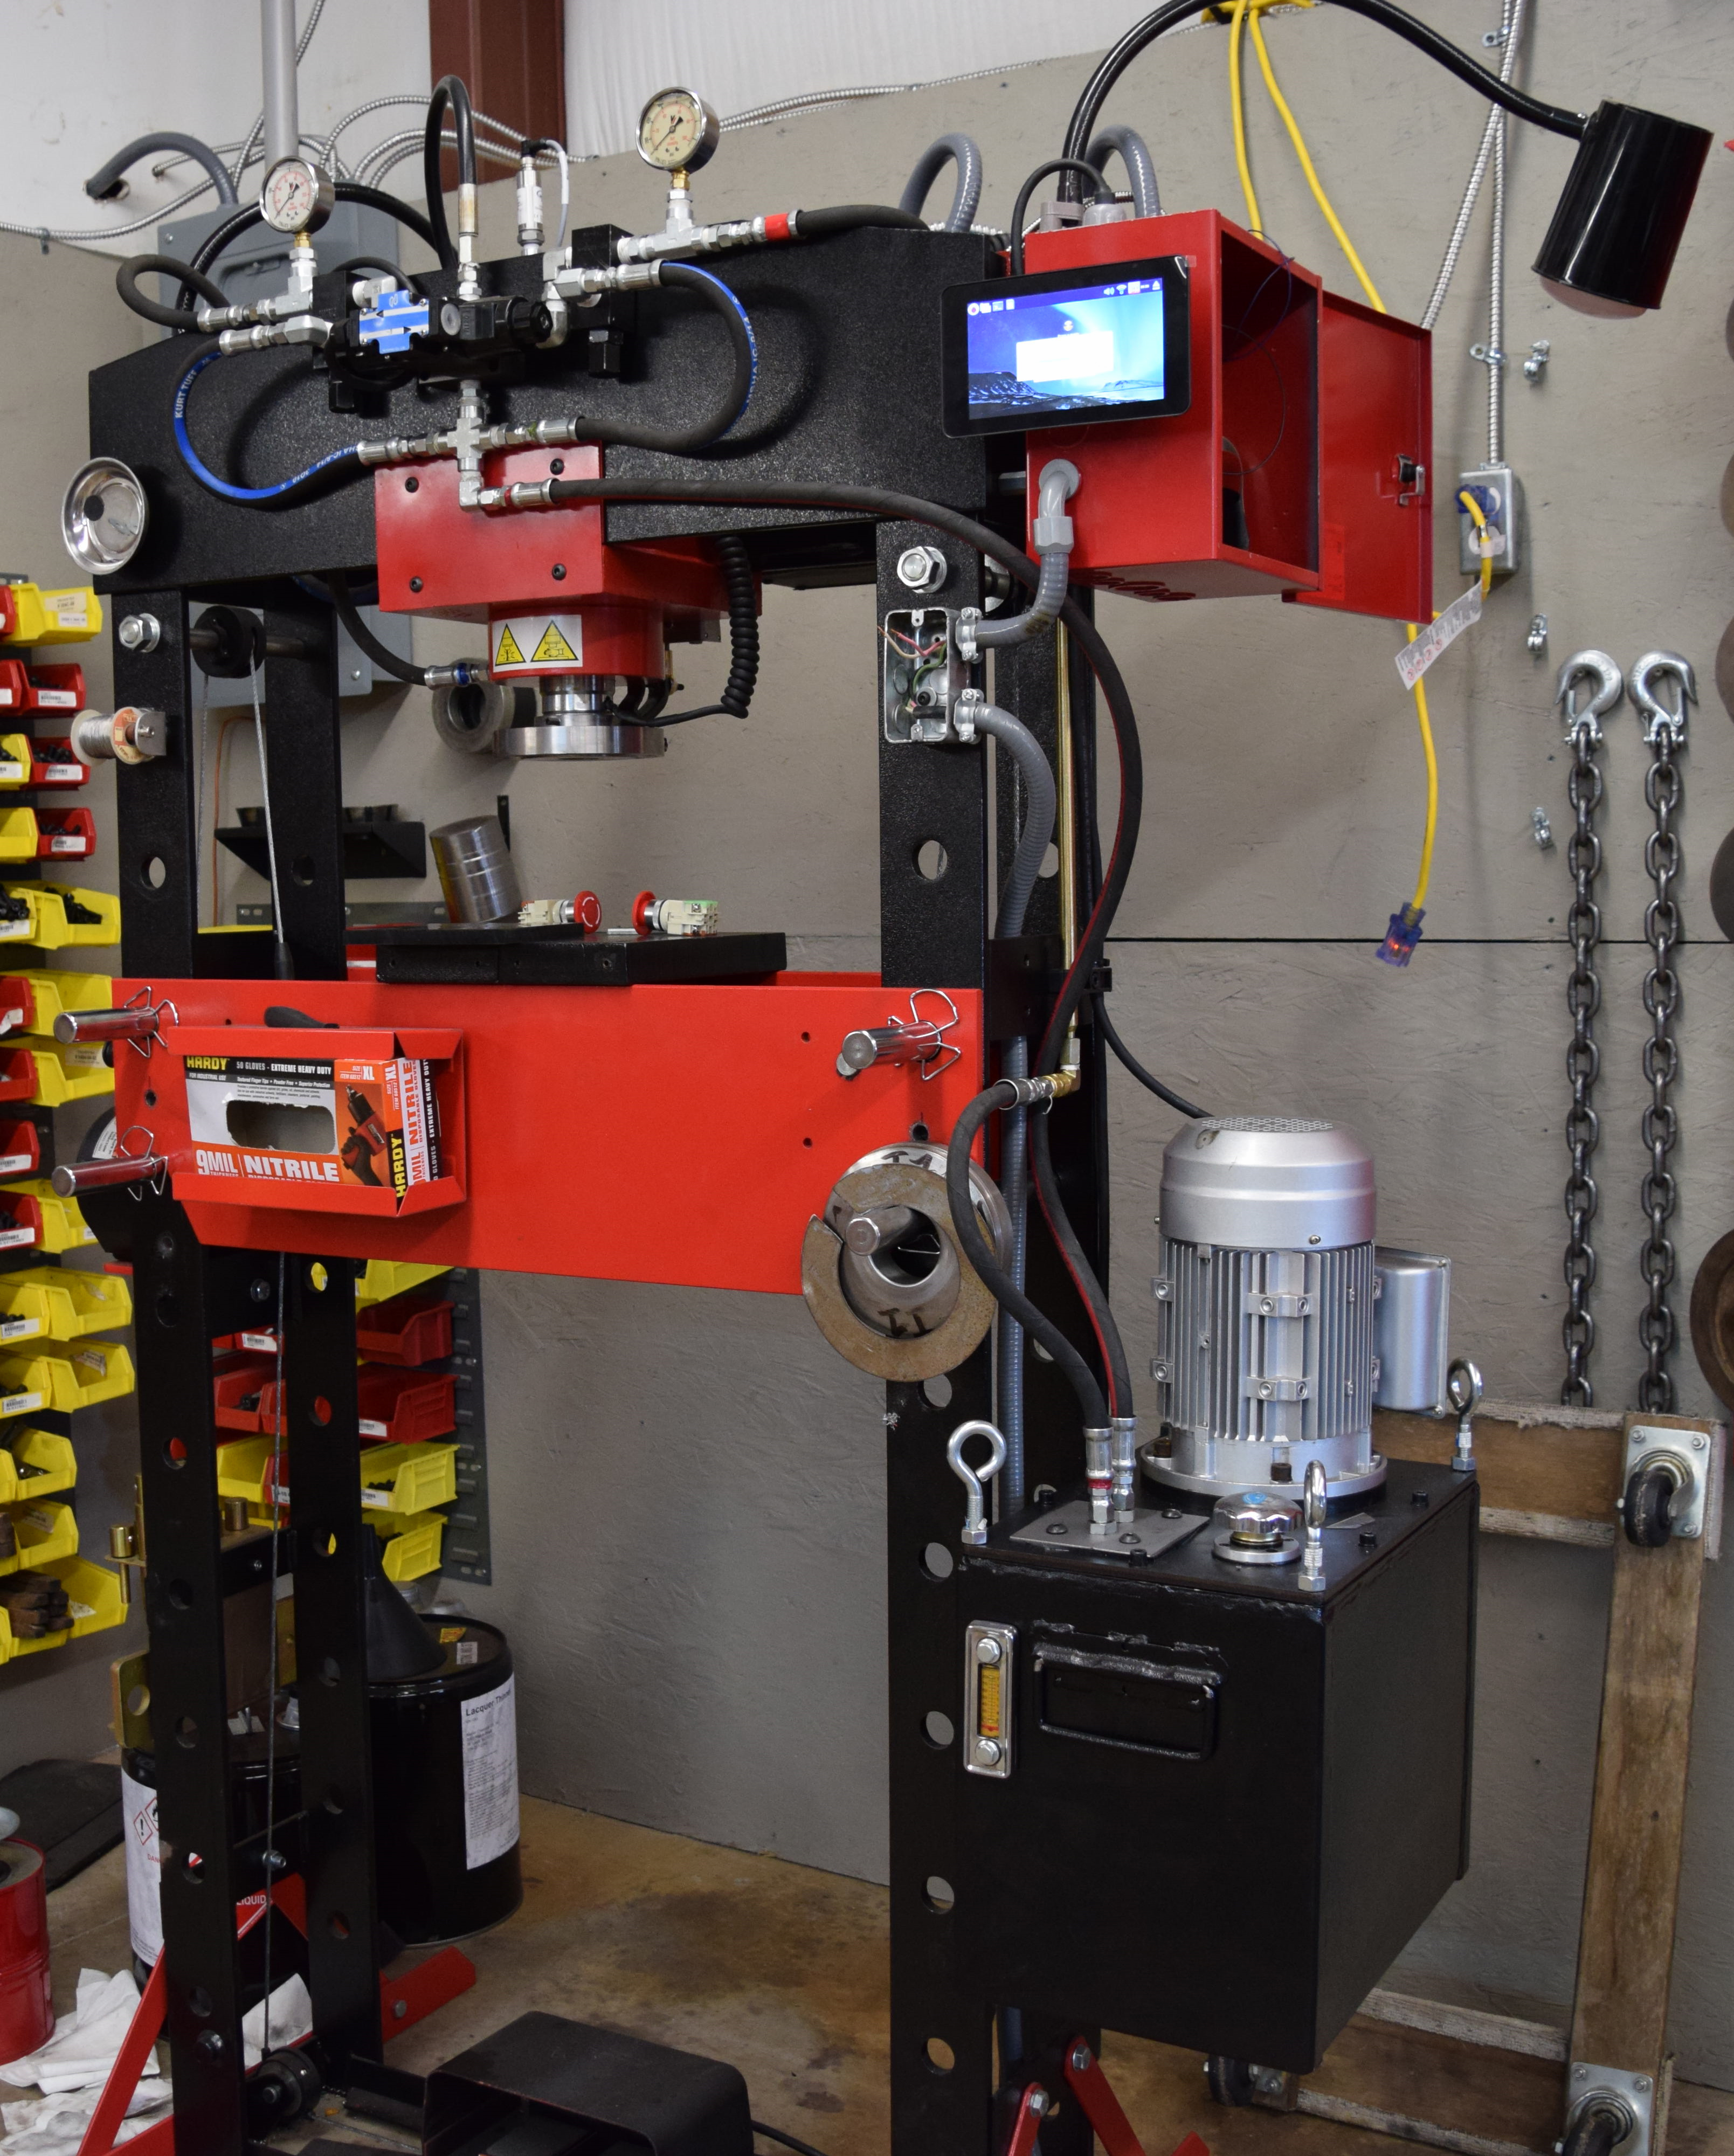
How does one create a more intuitive, time-saving 50-ton press? Together with my client, we set the criteria and scoped the project:
- Complete precise, customized pressing operations with minimal human involvement.
- Minimize operation cycle time.
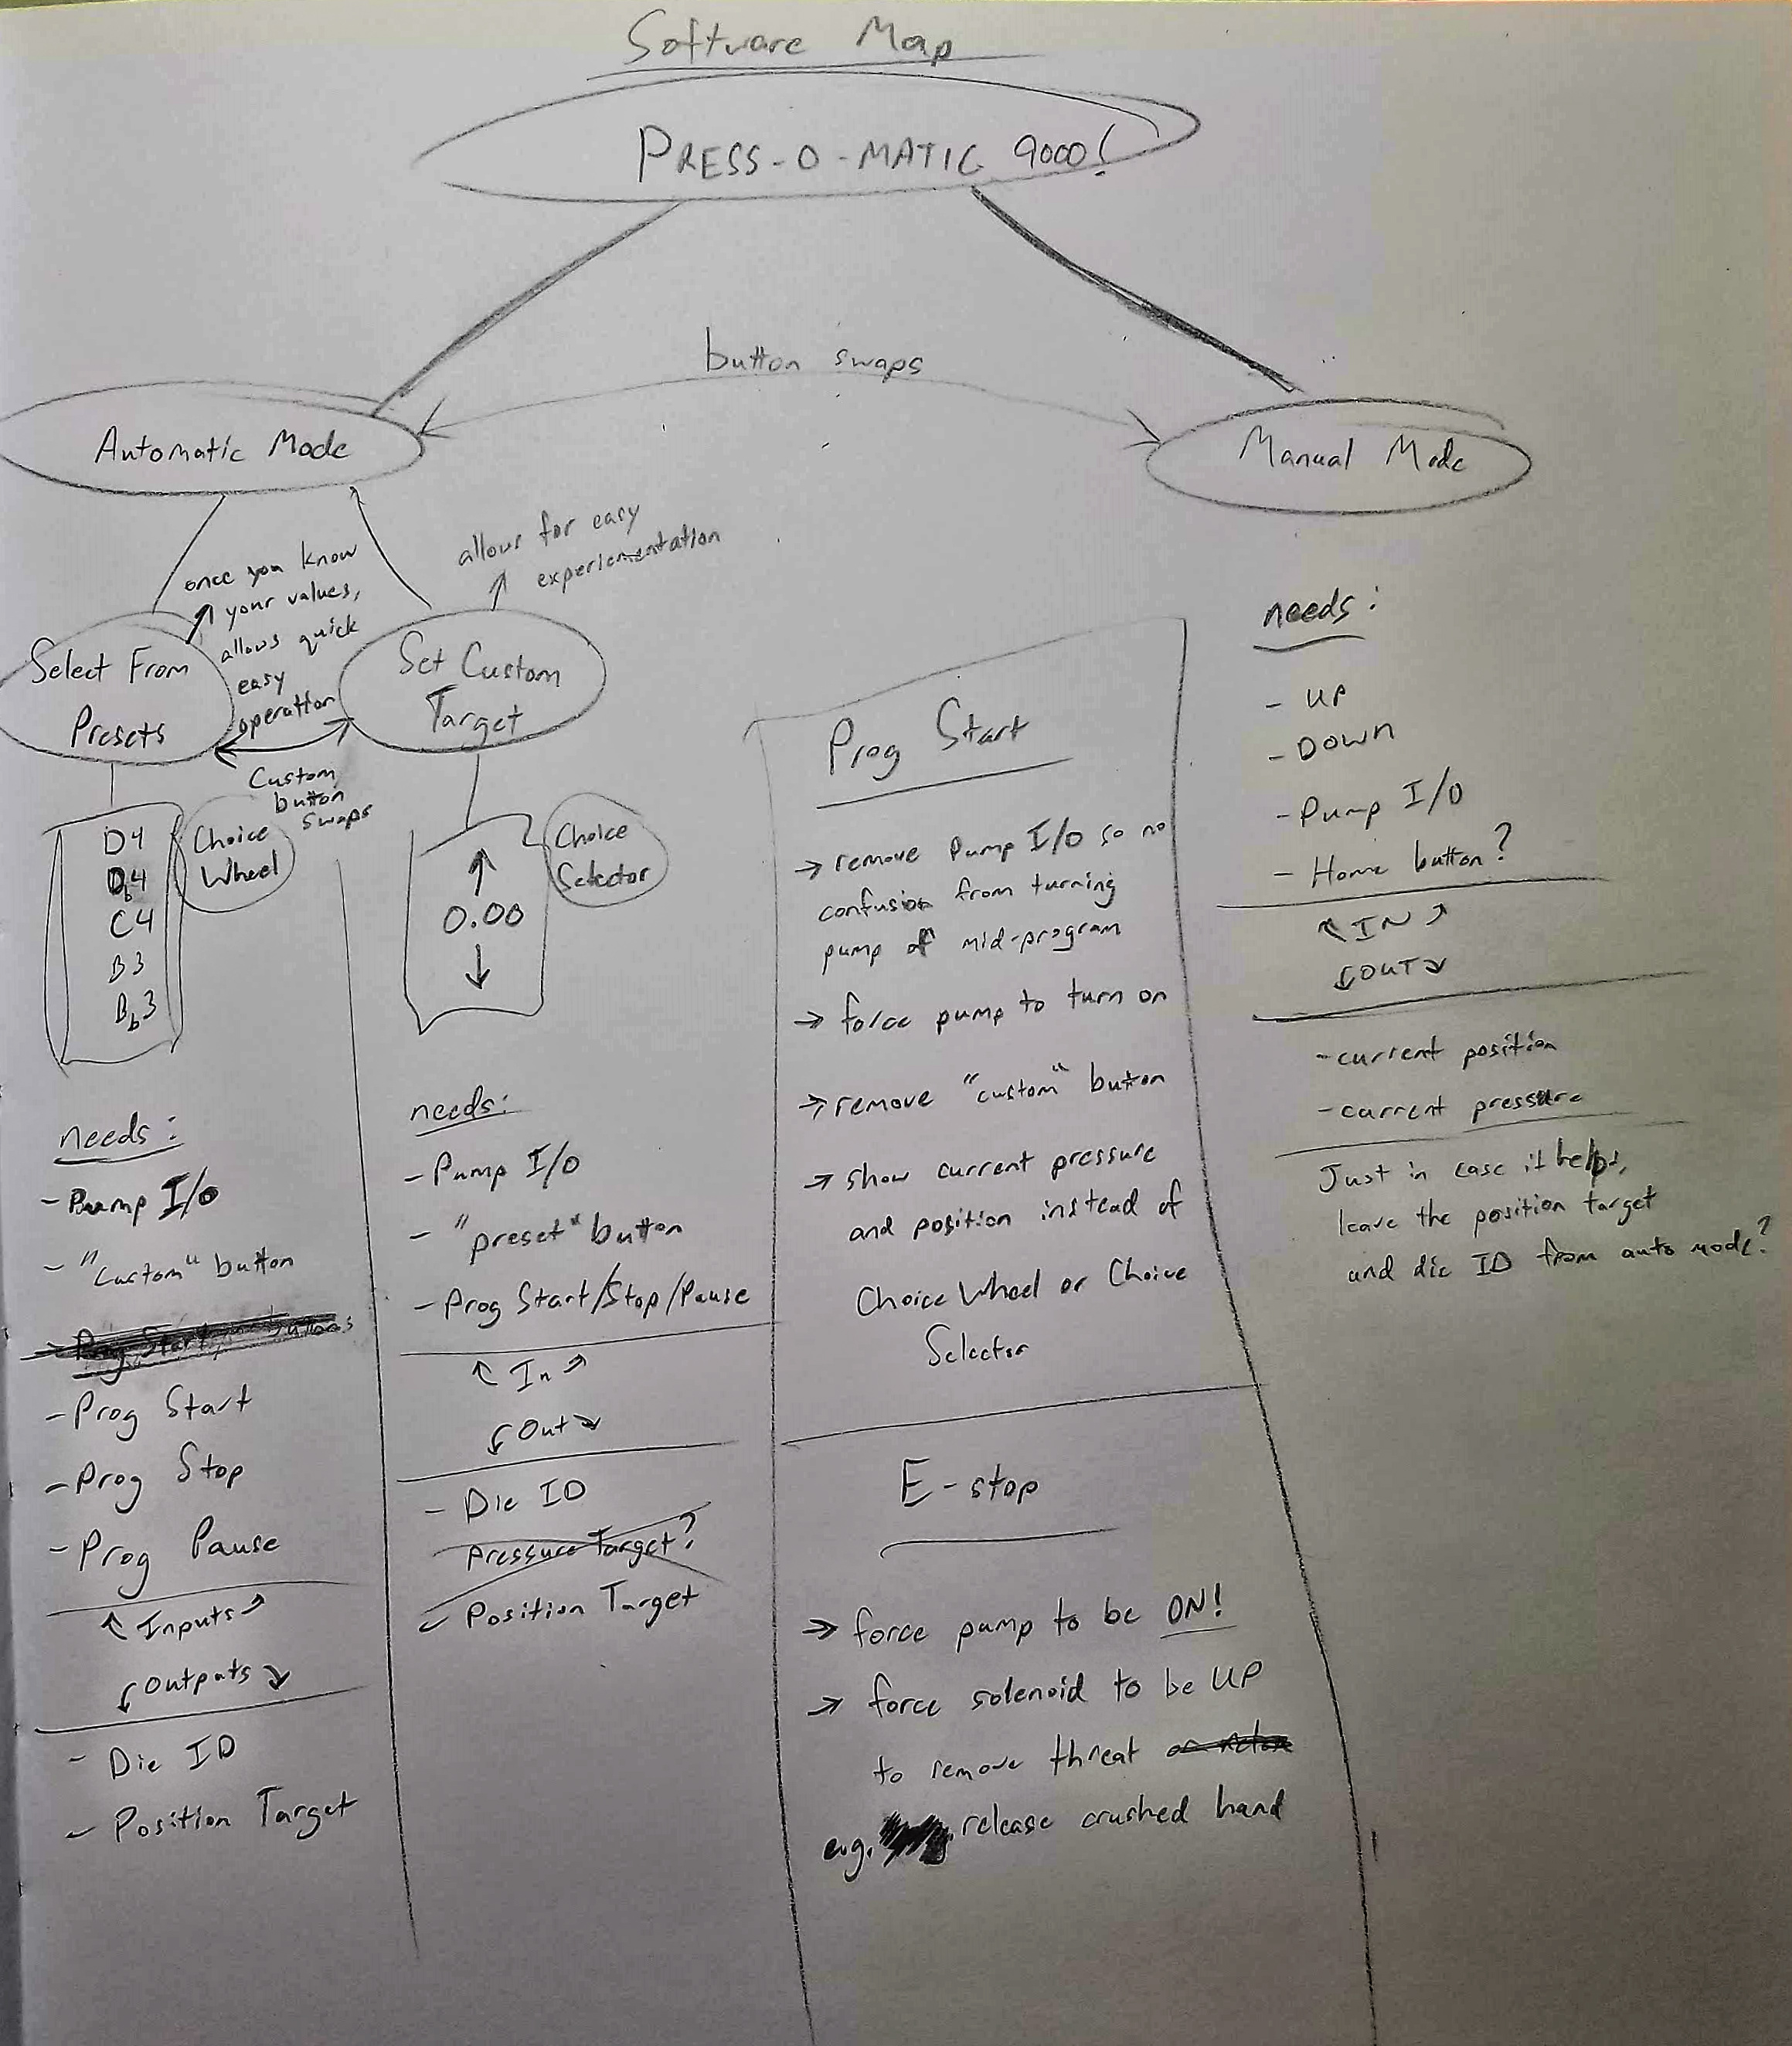
- Allow the storing of presets for each custom pressing operation.
- Use easily-accessed components for ease of repair.
- Allow manual and automatic operation via foot pedals and/or touchscreen if possible.
I coordinated closely with my client's machinist, who took care of most mechanical operations (hydraulics and pressure/distance/home-switch sensor installation), while I focused on the electrical and programming tasks.
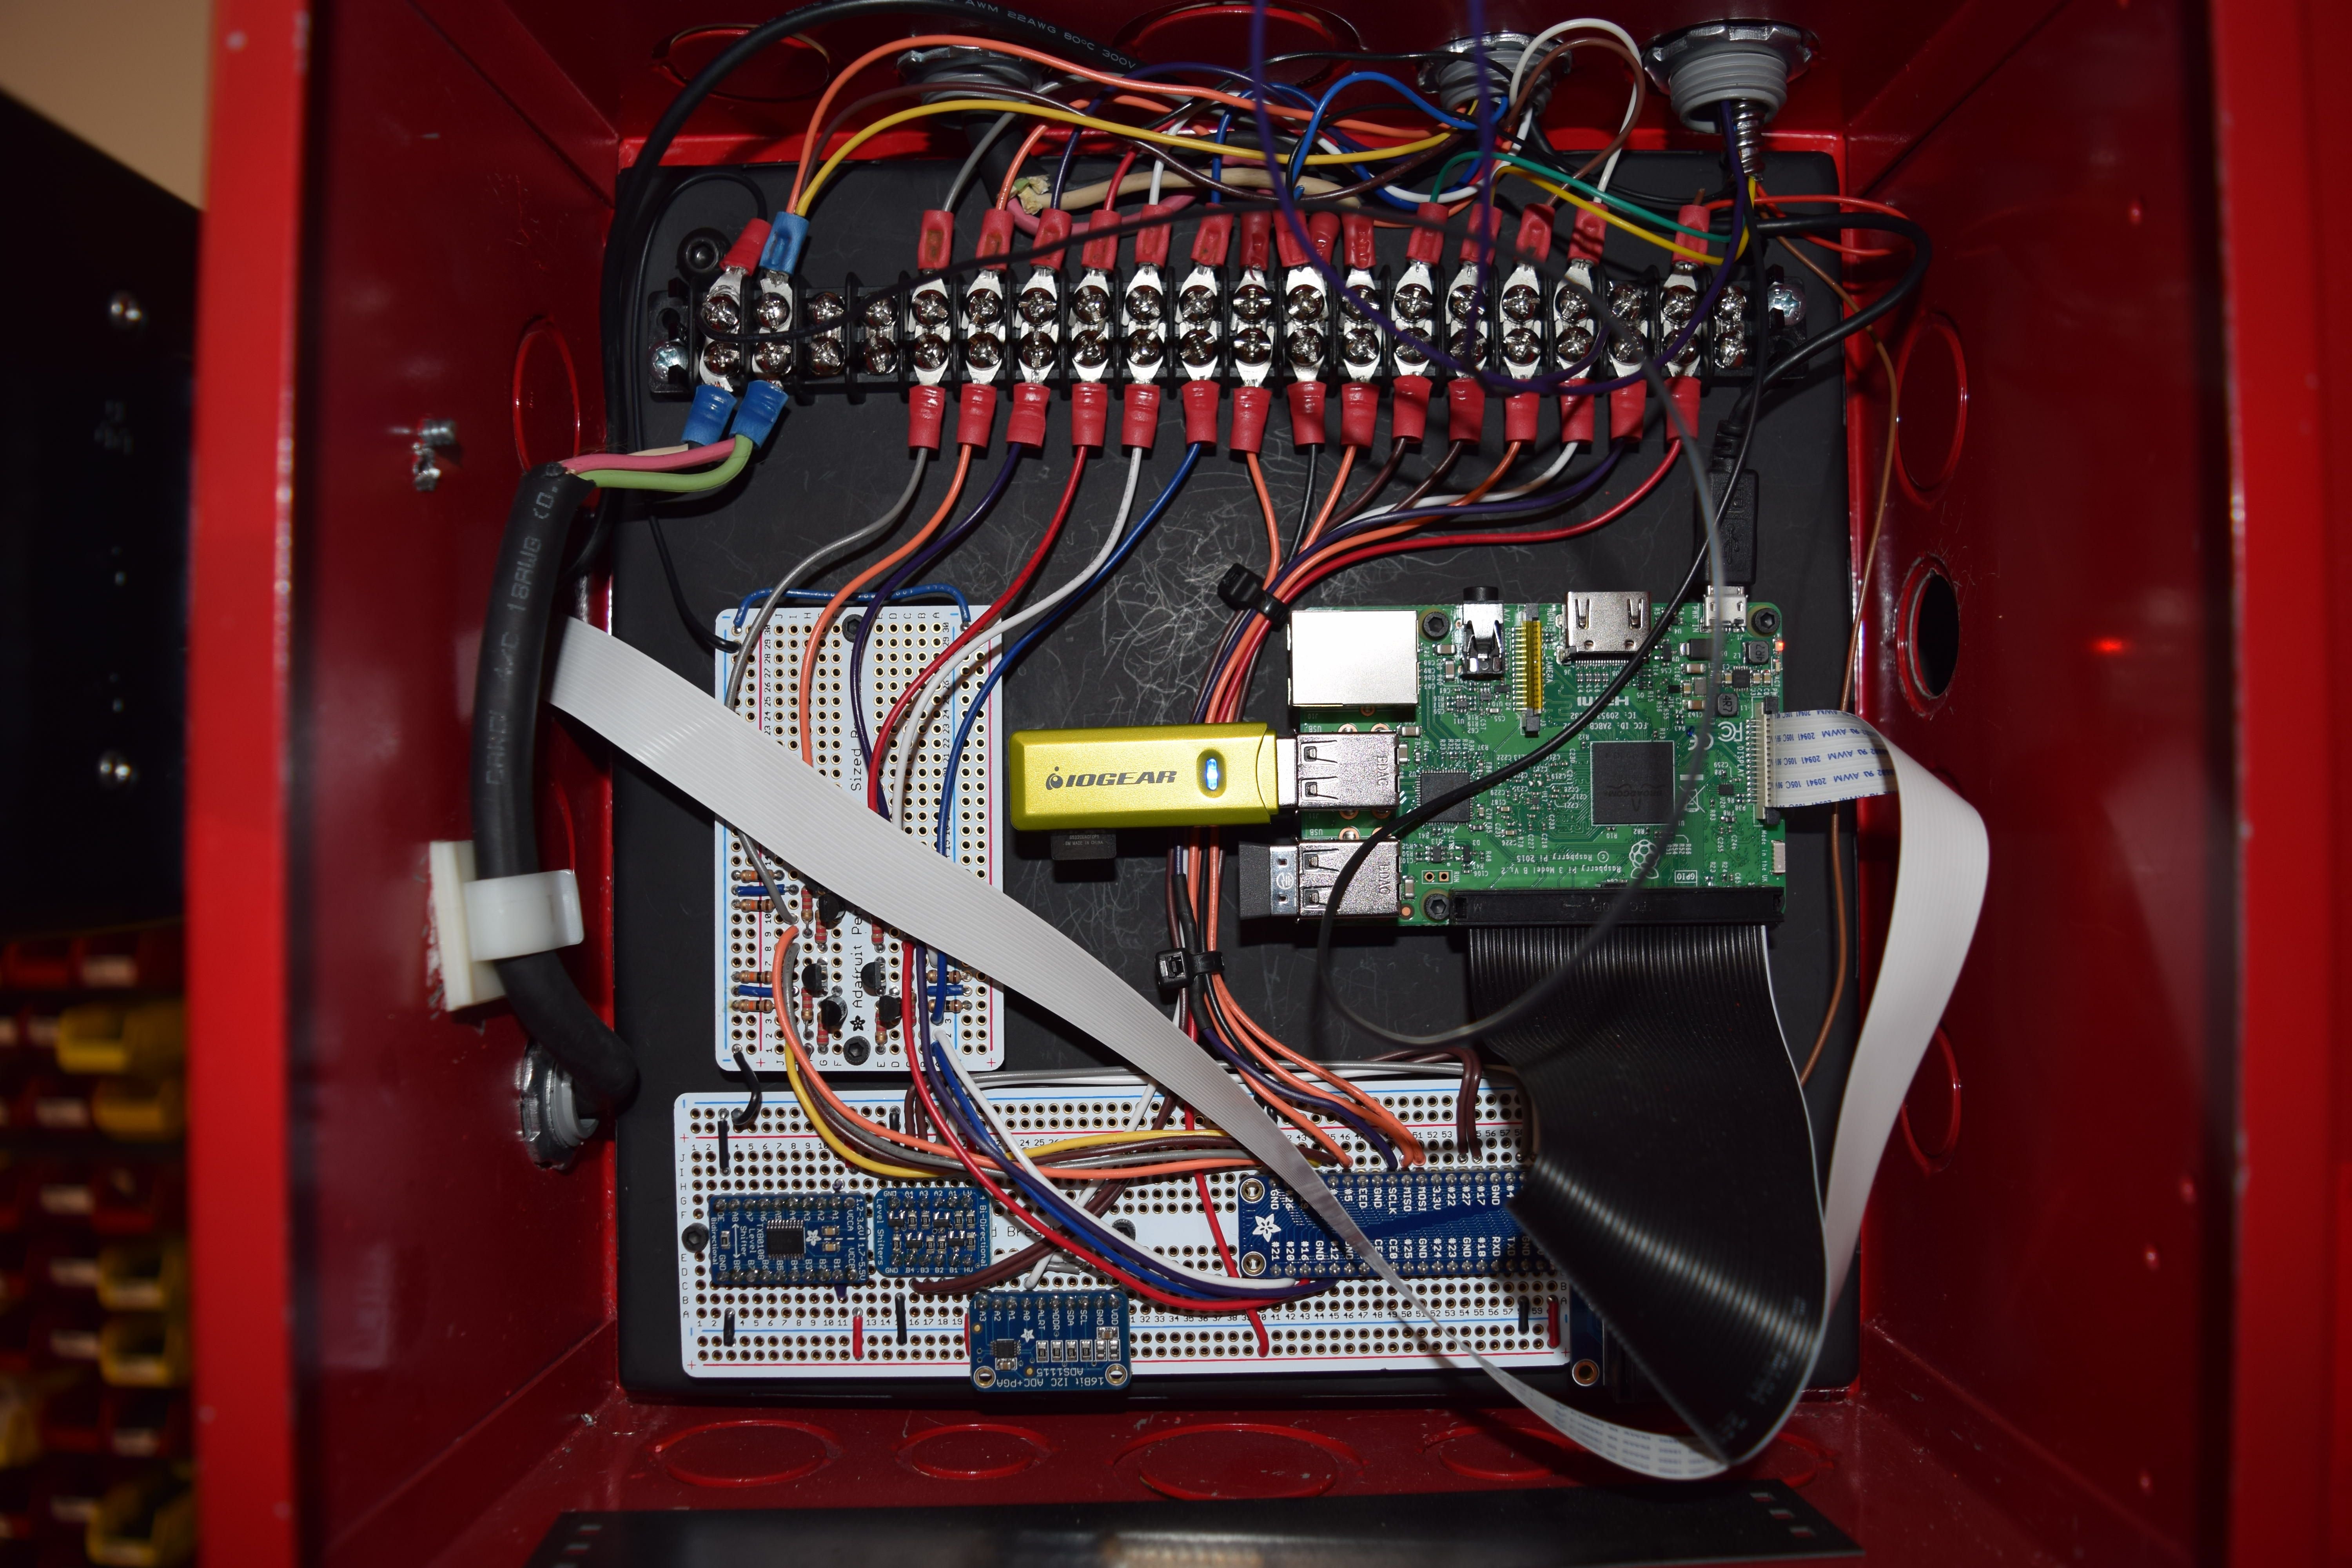
After estimating that a Raspberry Pi 3 could smoothly handle all required actions simultaneously (run a multi-threaded touchscreen user interface, track up to 2000 interrupts per second, read pressure data), I built a Qt 5 cross-compiling tool chain and set to work teaching myself how to use it.
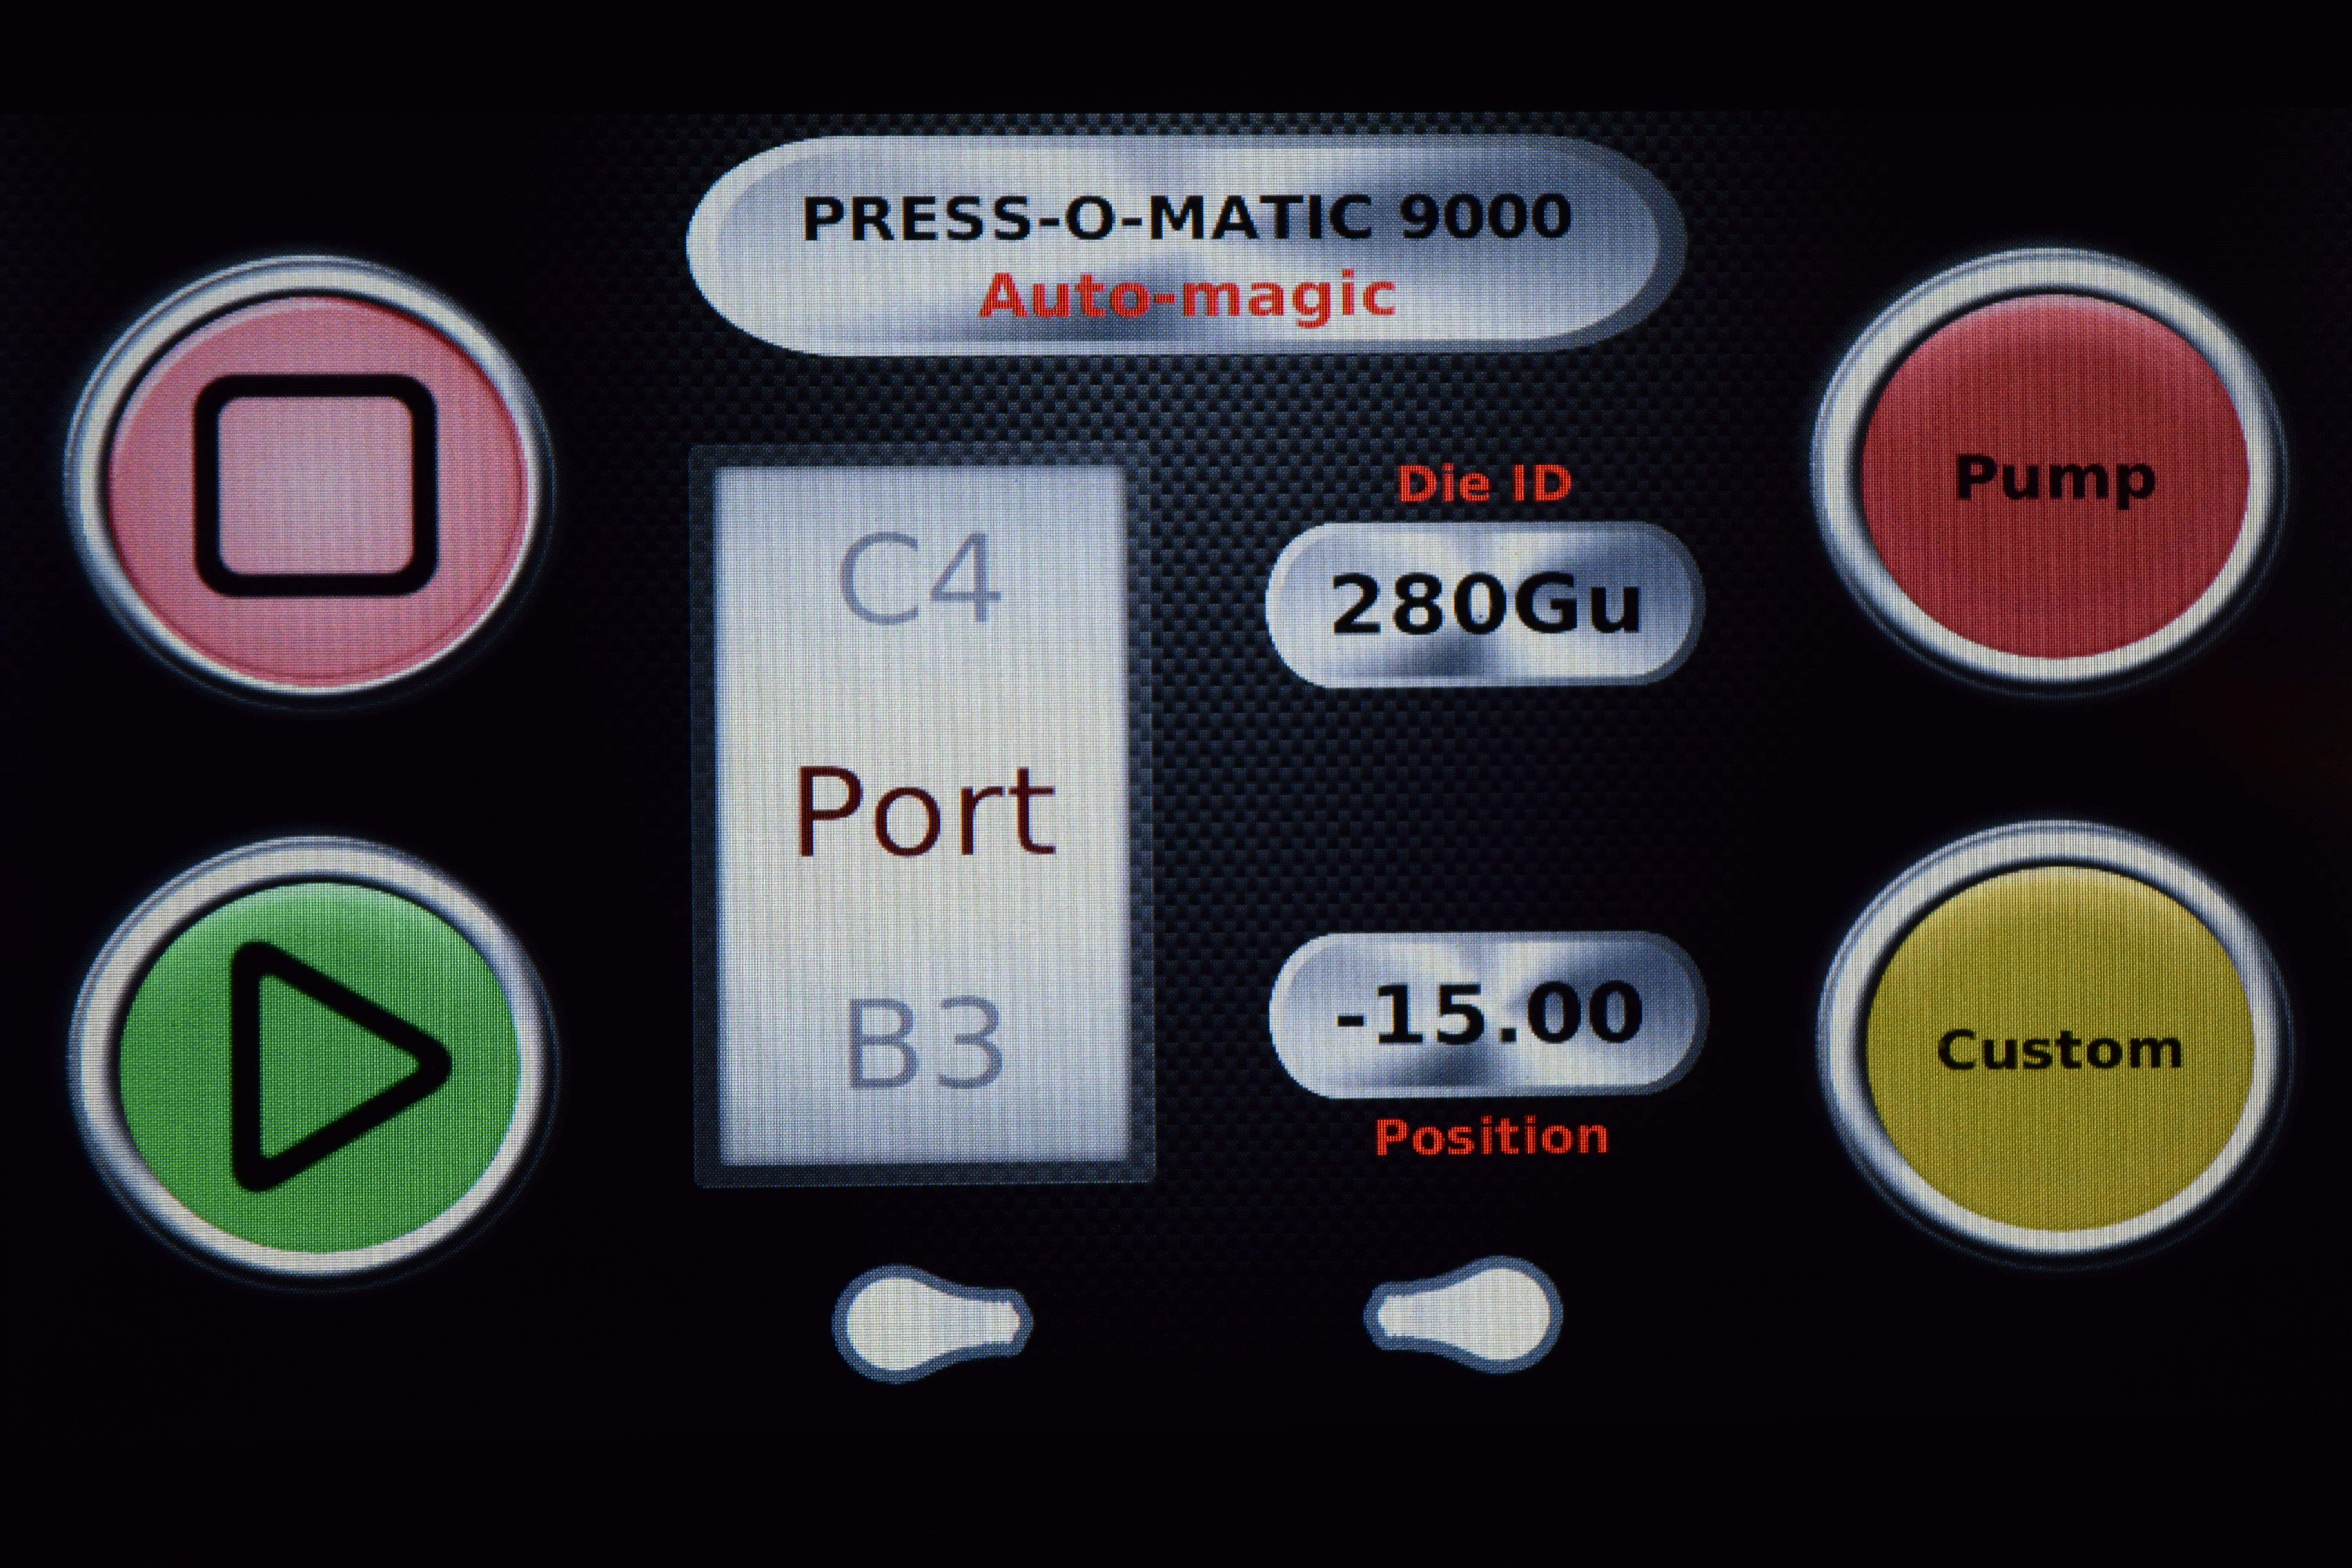
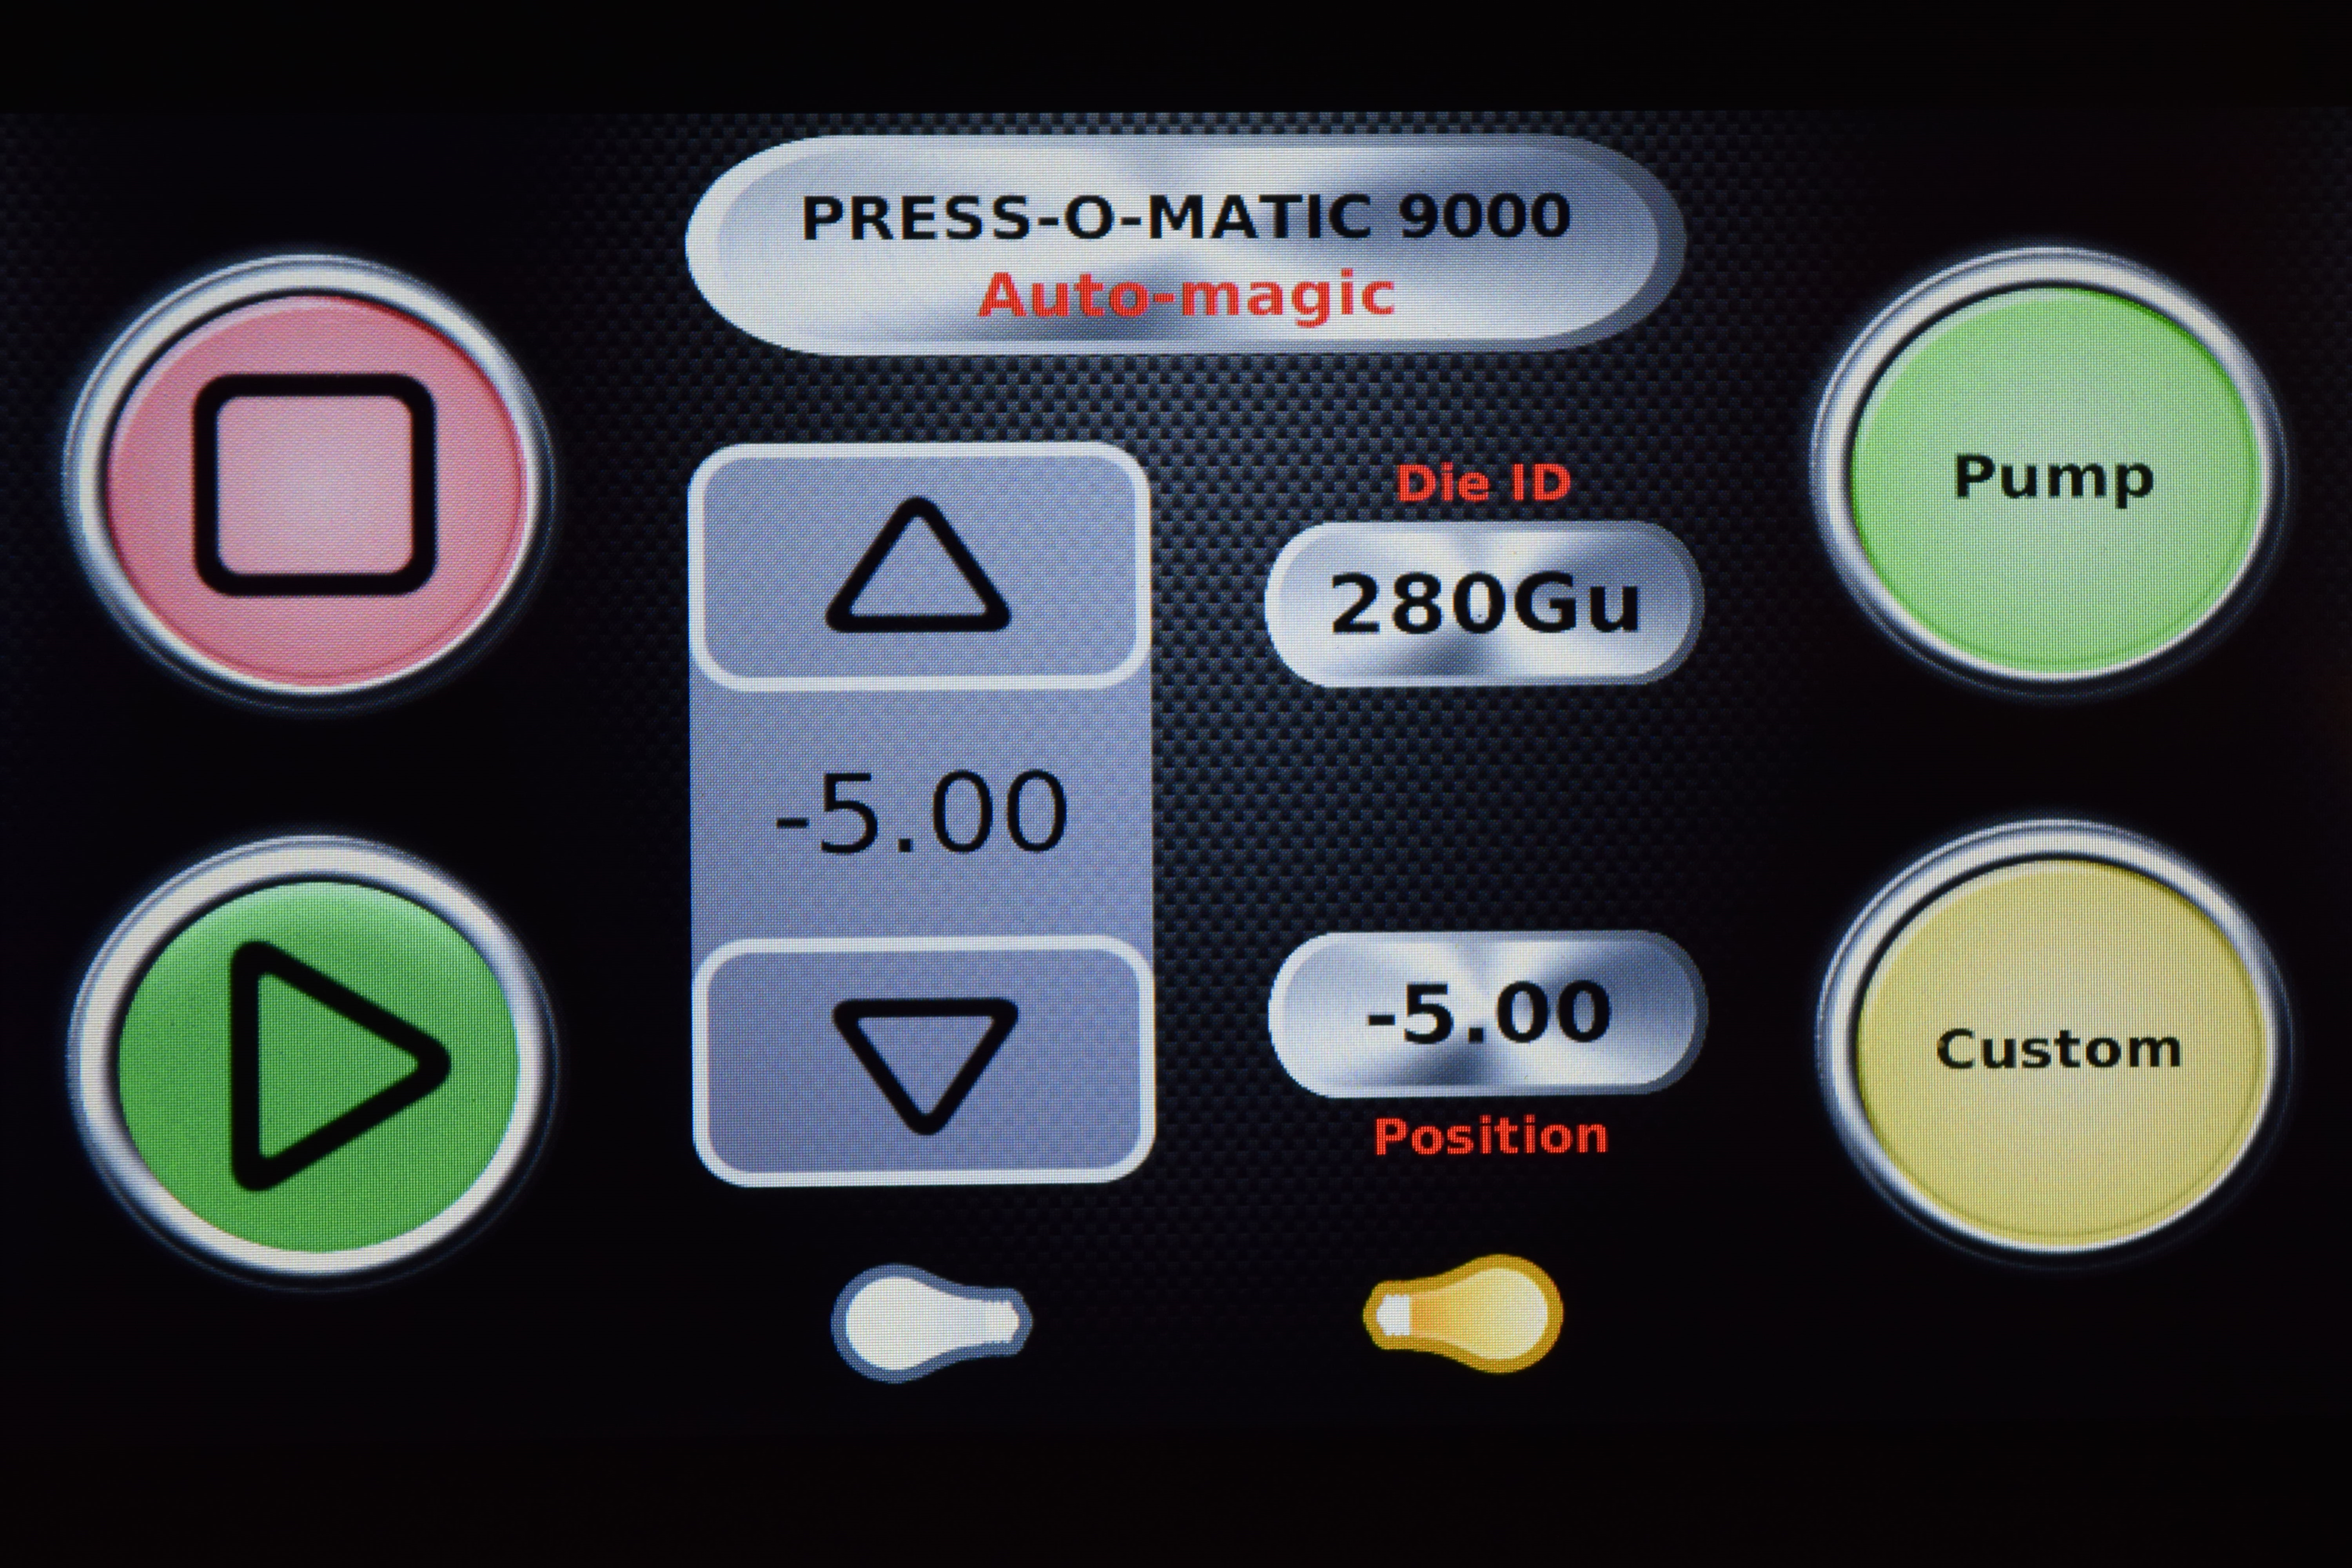
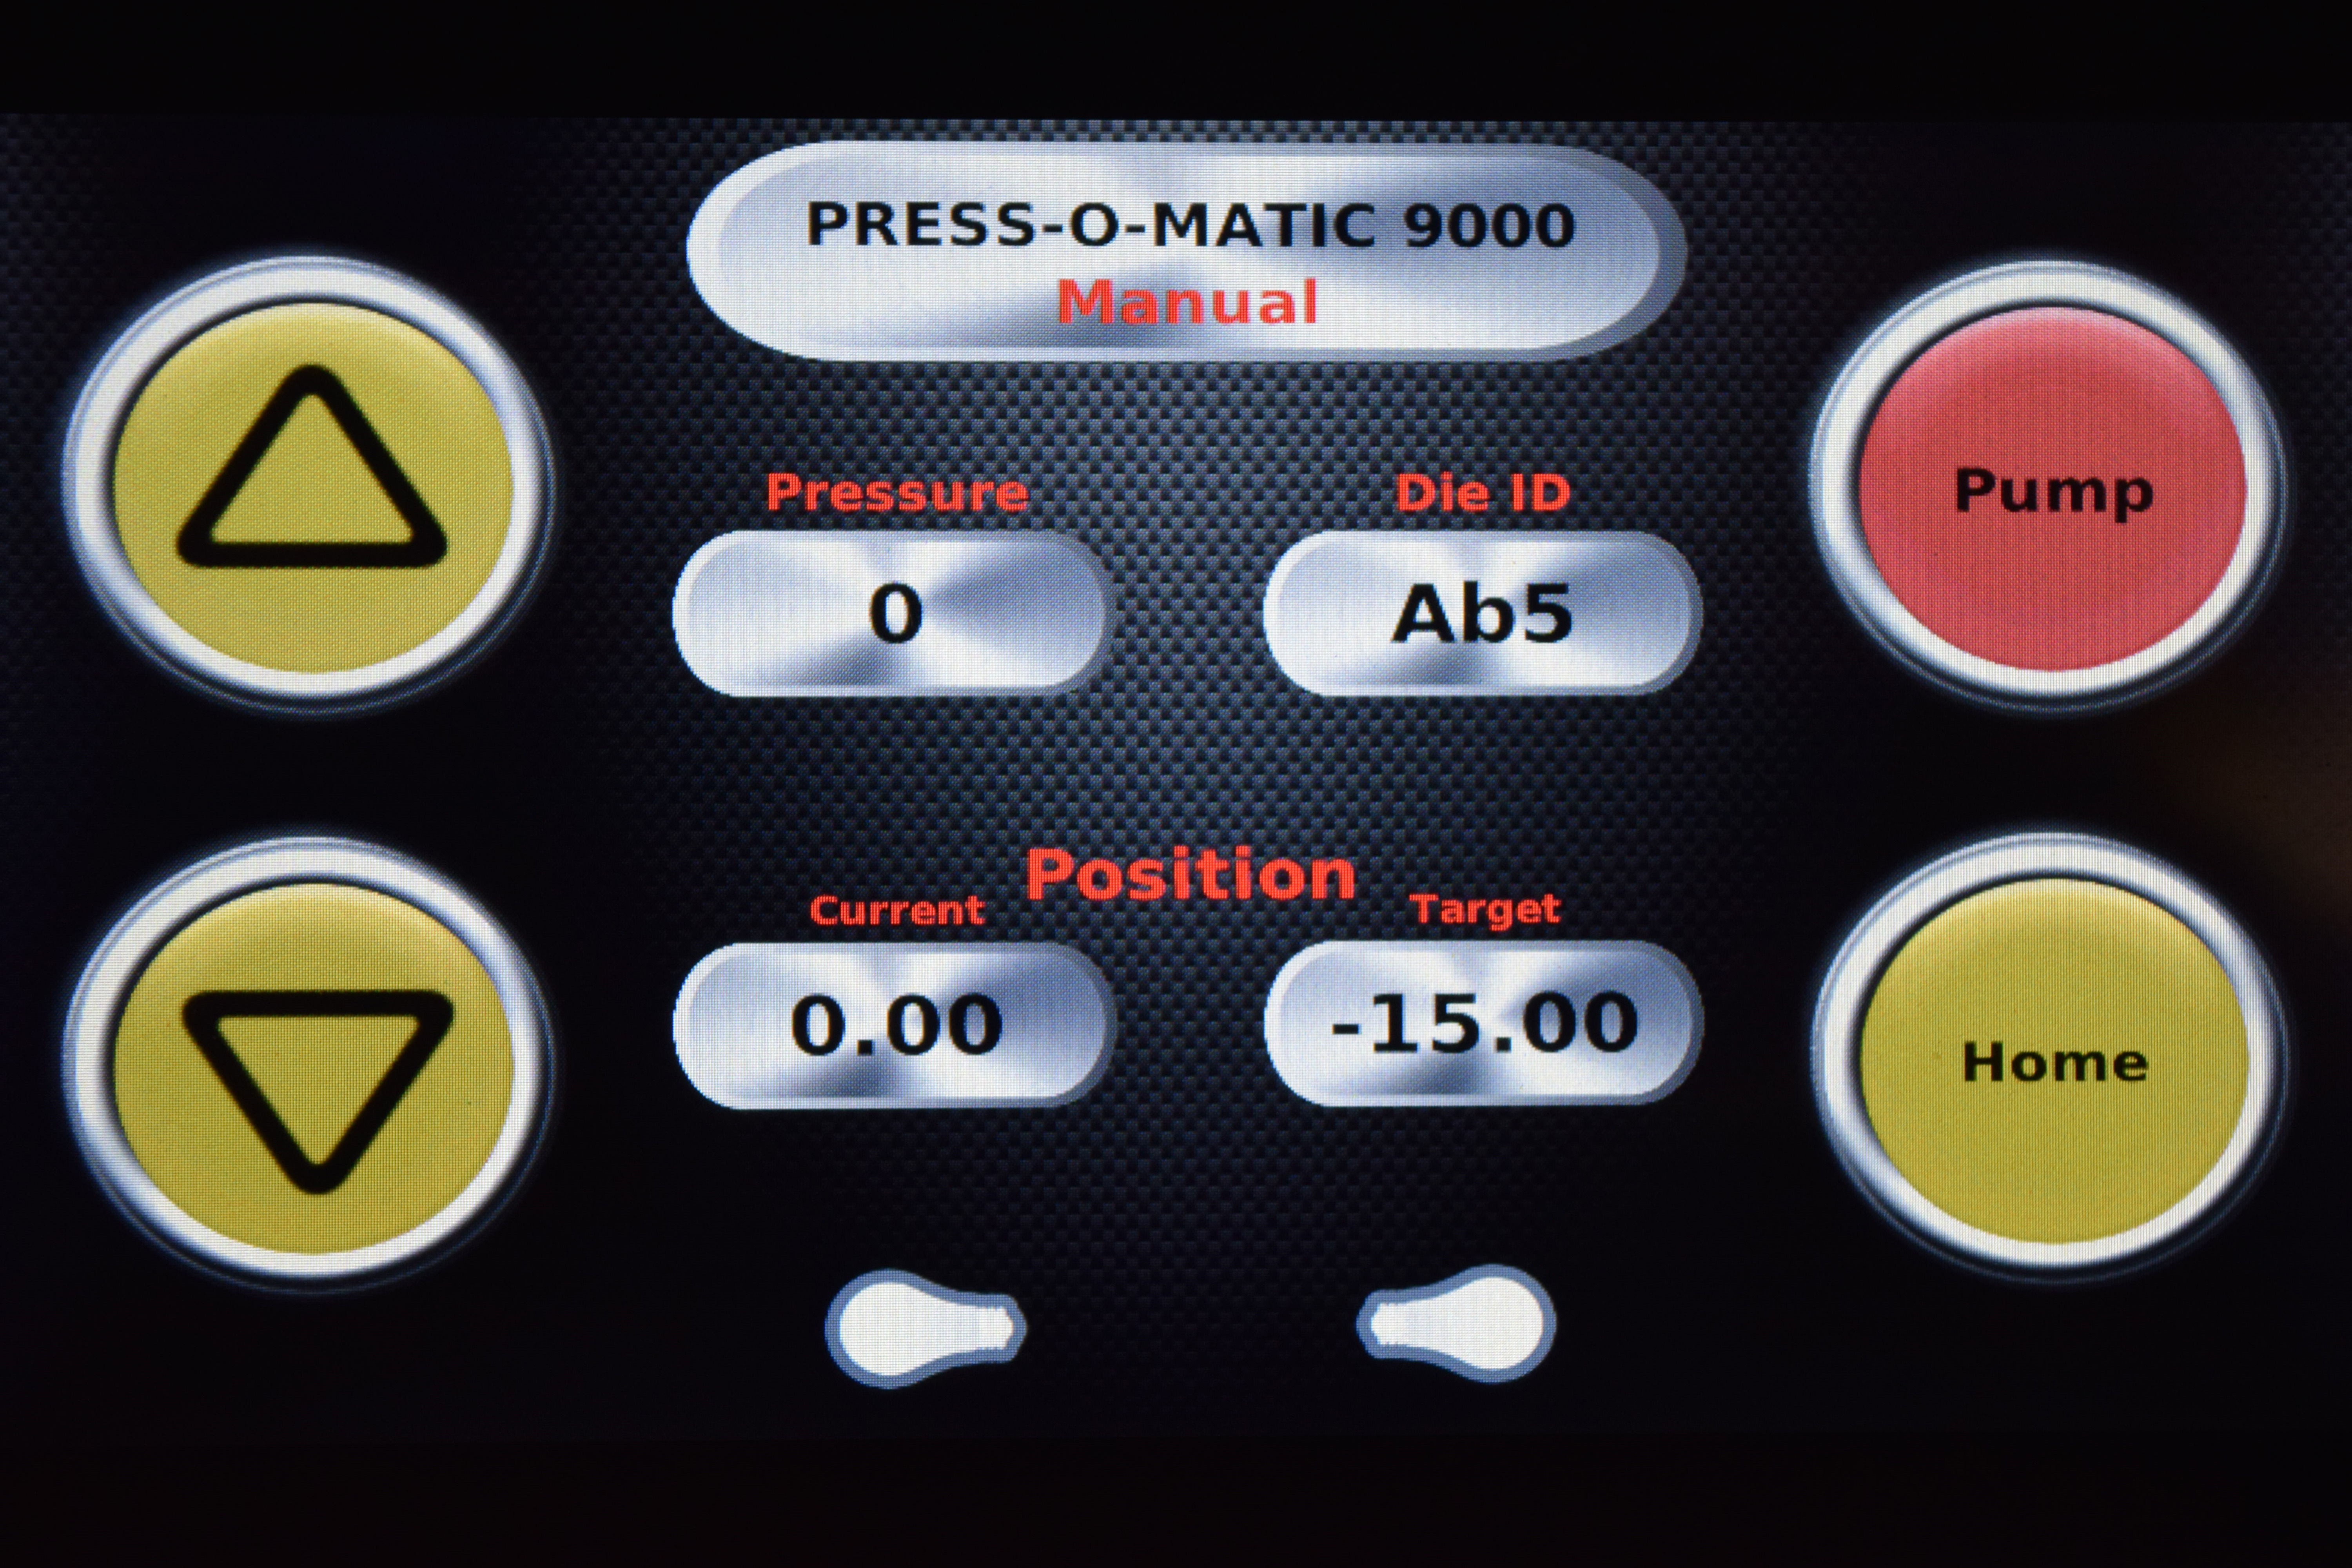
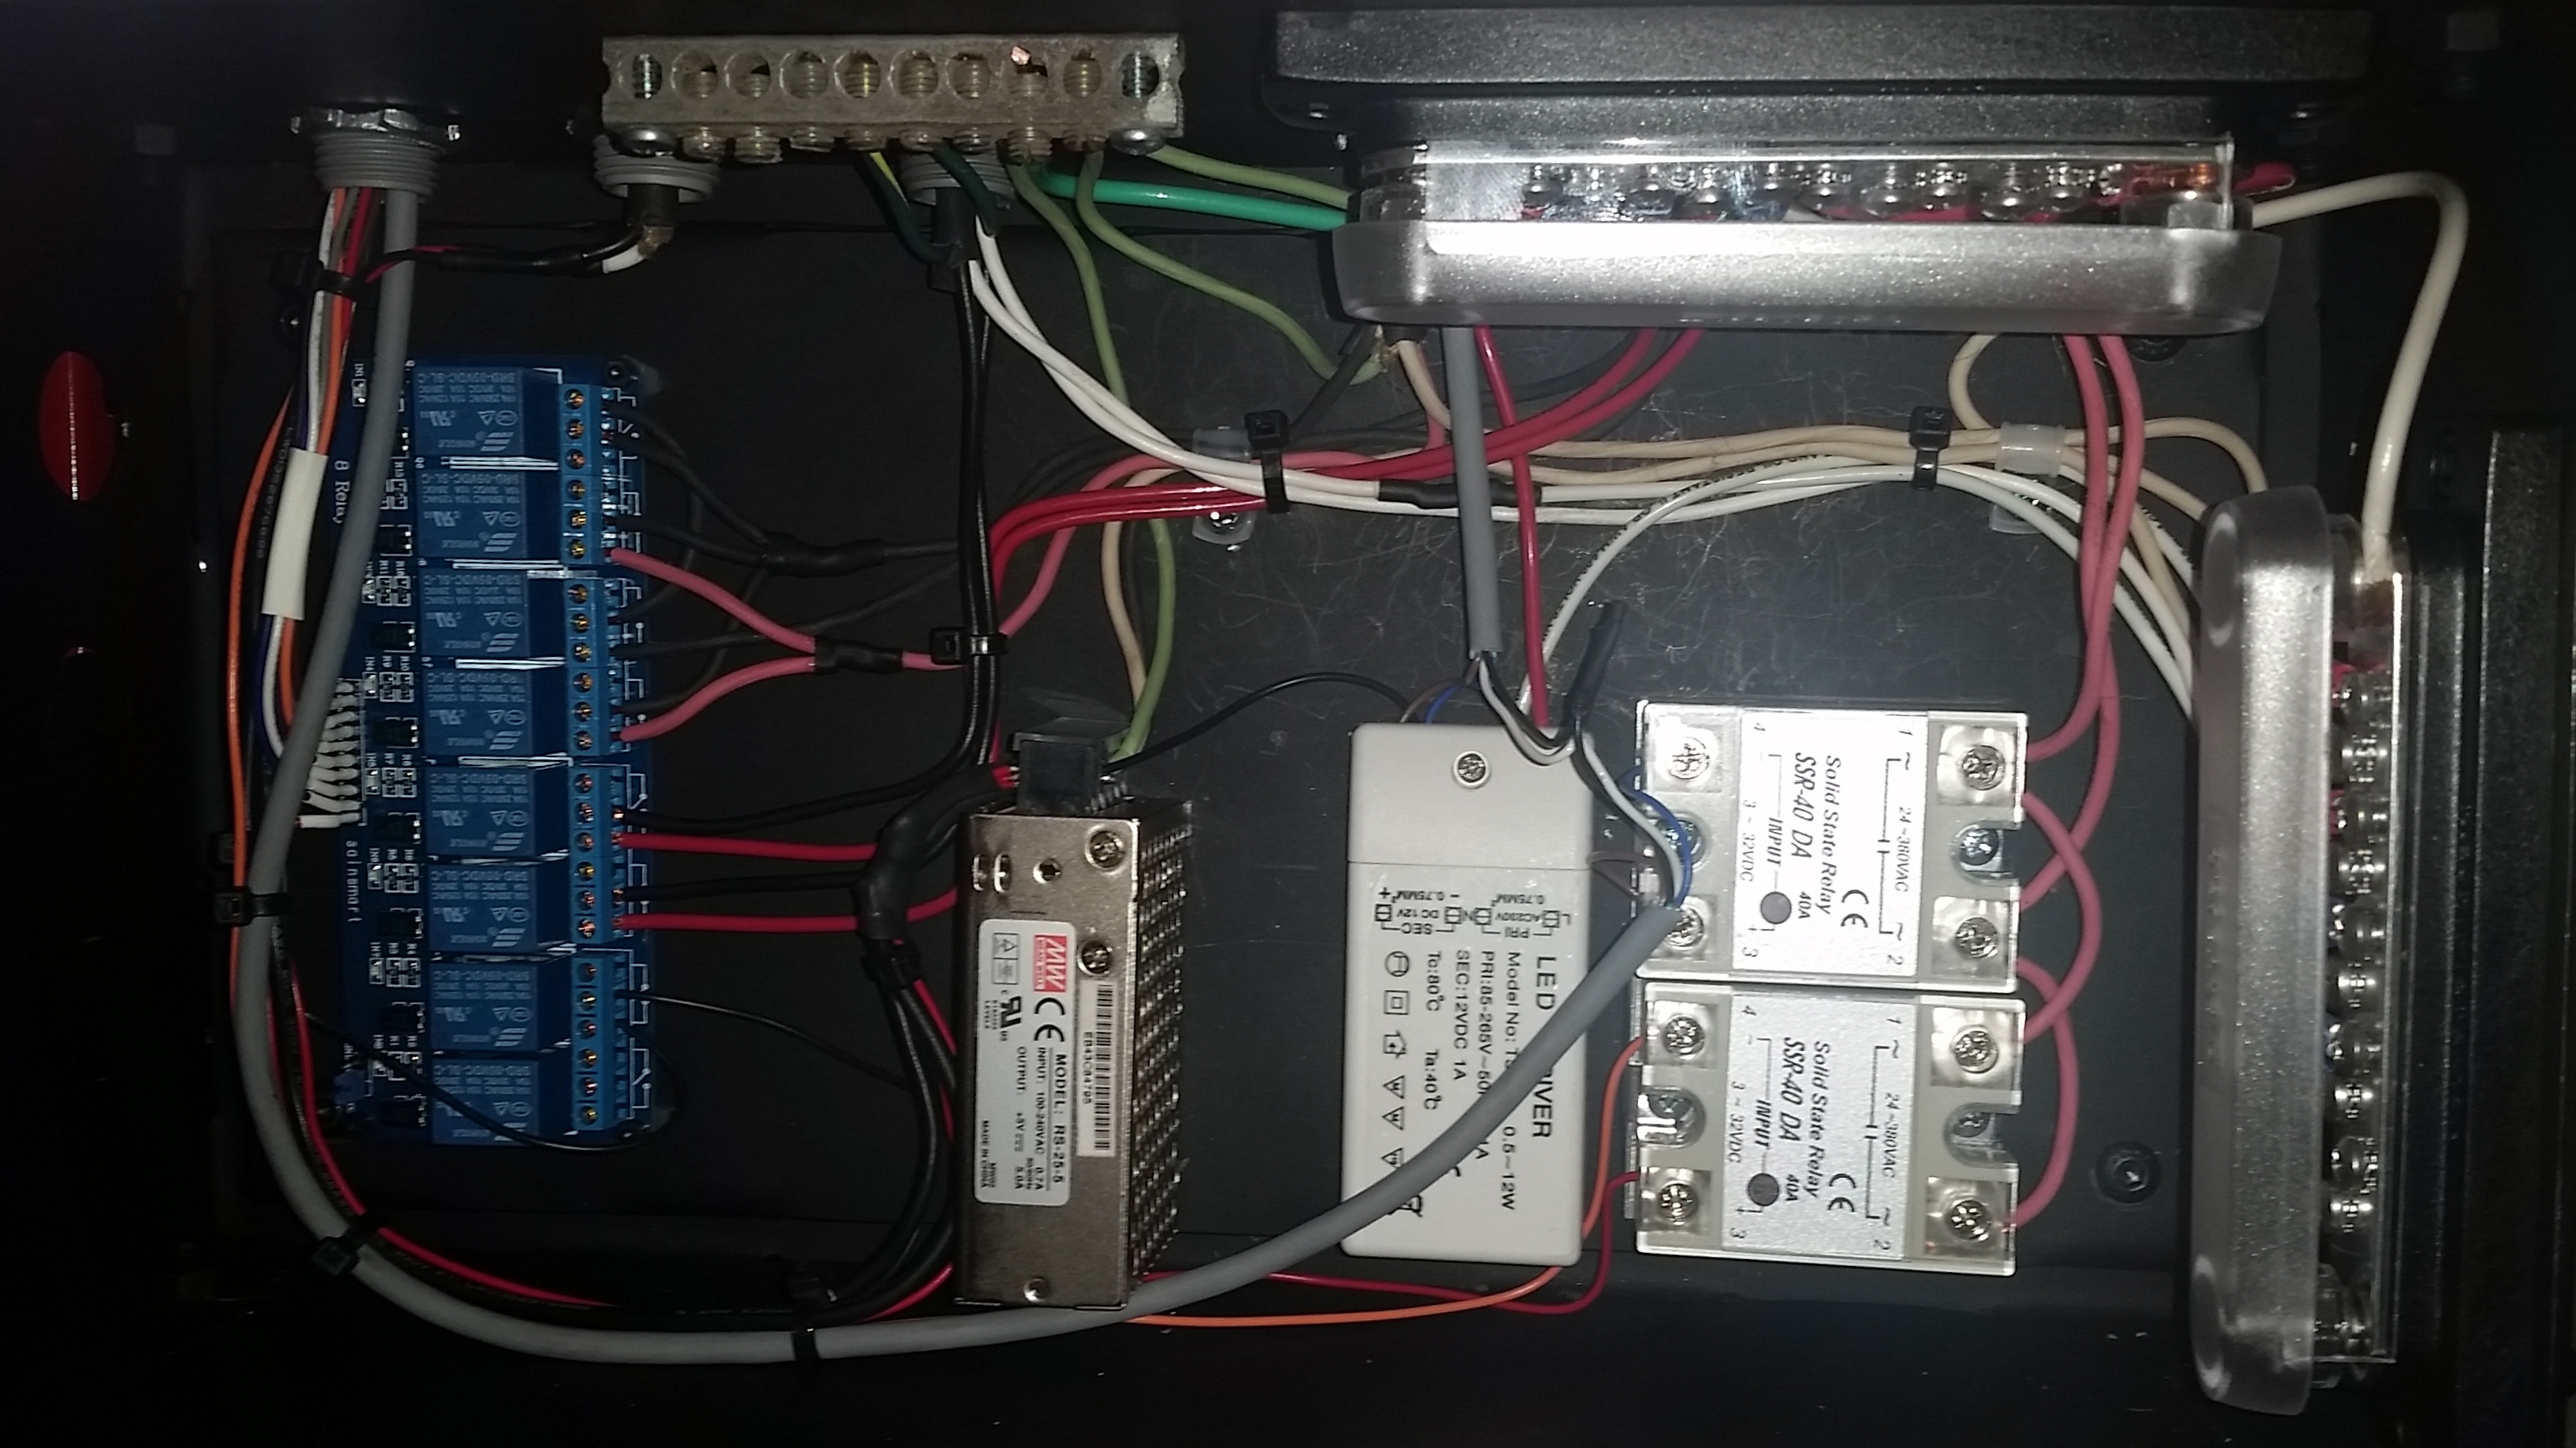
With the GUI mocked up, I tested each component to ensure compatibility with my C++/QML code and the RPi 3 hardware before committing to a final, soldered system. Once the low voltage components were soldered and functioning, I installed the high voltage AC power circuitry, carefully routed to minimize electromagnetic interference.
After finishing the build, I worked with the intended users of this machine to ensure each interaction was optimized for each use case. We practiced every possible use of the GUI and made some minor changes in button size/location to suit the user's needs.
The final product worked as predicted, and was completed in just five weeks. In that time I was able to quickly teach myself Qt 5, multi-class C++ programming, and multi-threaded GUI development. I learned valuable skills in software development, data handling, troubleshooting/debugging, and project planning. I developed a complex device from scratch and exercised my understanding of human-computer interaction, all while furthering the cutting edge of a beautiful musical instrument I love.