
Beluga Bubble Ventilator
Respiratory failure is the #1 cause of pediatric mortality worldwide, and the #1 cause of adult mortality in low-income countries (WHO 2016). Ventilators are the most effective way to combat respiratory failure and save millions of lives. So, why don't we distribute ventilators worldwide to address the issue?
The Problem:
- Most ventilators are simply unaffordable ($15,000-$60,000 each) where they are most needed in low-resource environments
- Training staff to use a diverse array of donated equipment is difficult
- Technical support and maintenance infrastructure for these complex machines is entirely missing, leading to junkyards of broken equipment
Our Solution:
- Design a new ventilator for minimal cost and complexity
- Send prototypes to our academic partners in Uganda to test design assumptions and map market stakeholders
- Work with local manufacturers/suppliers/regulators to revise design
- Create training procedures in close partnership with local clinicians
- Scale: establish pilot partnerships to expand to new low-resource markets
Ventilator Conception
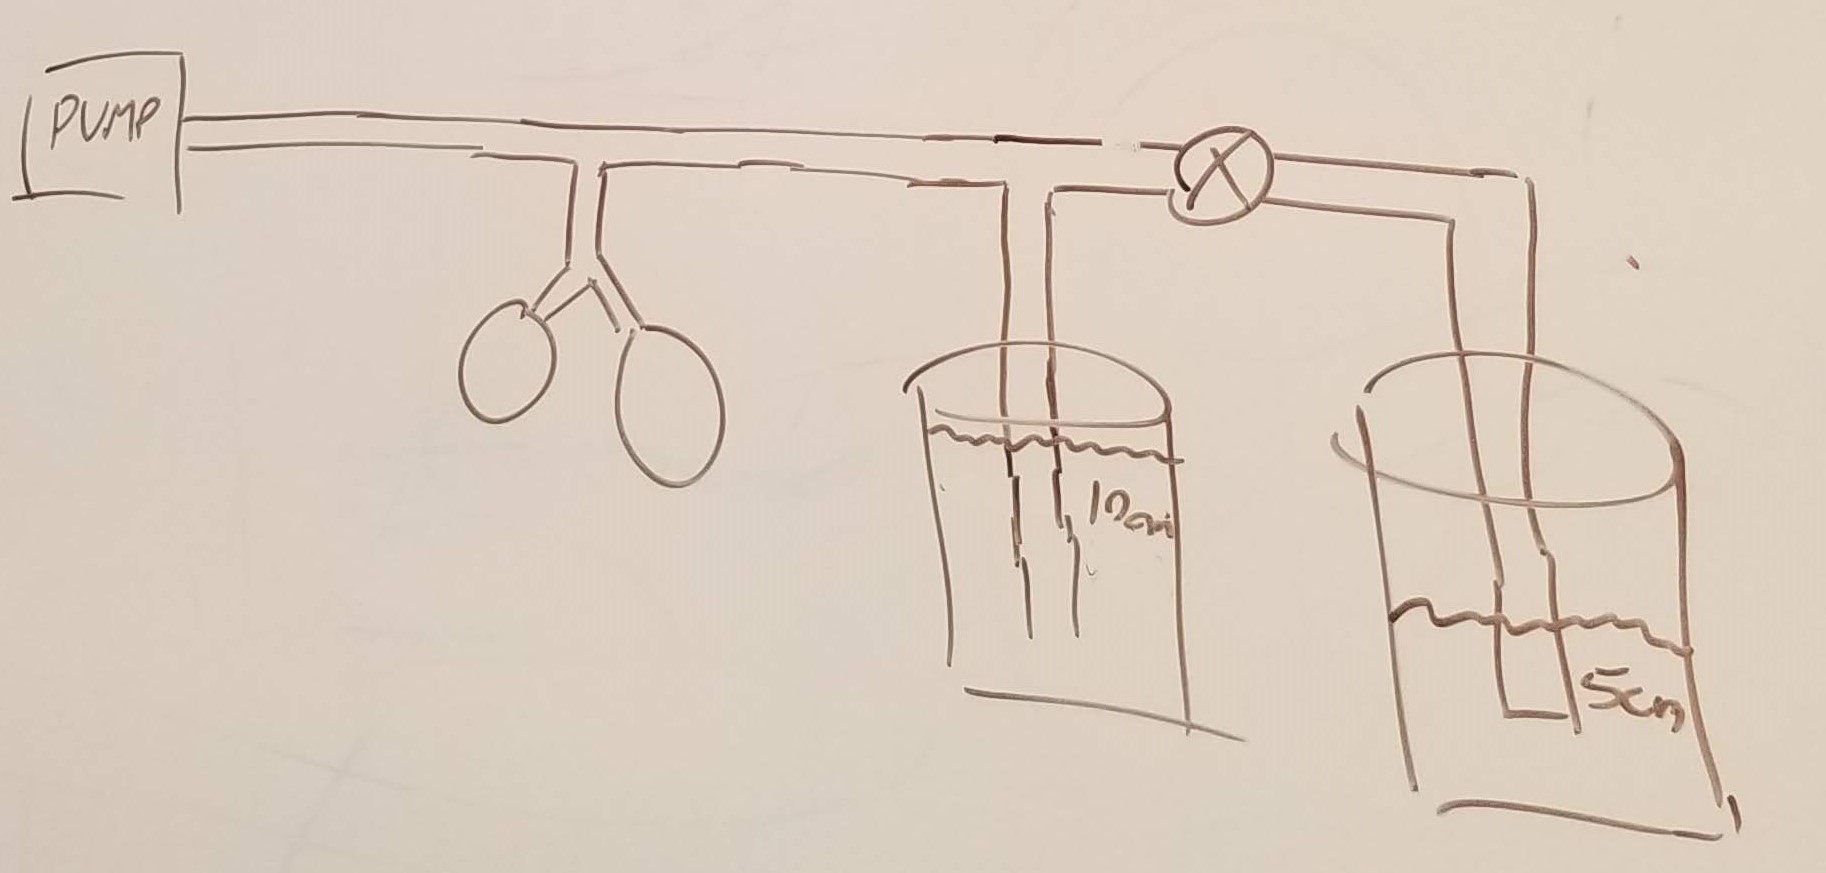
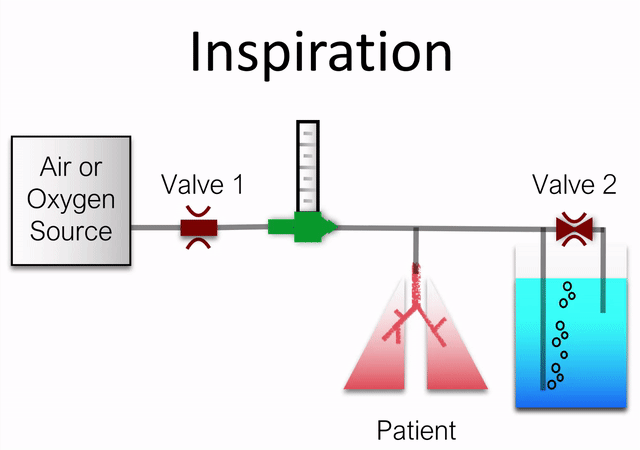
In October of 2019 Gopi Mohan and Ryan Carroll, both clinicians at Massachusetts General Hospital (MGH) at the time, came to me with an interesting concept based on Bubble CPAP, a low-cost technology that has been deployed successfully for decades in both low- and high-resource settings. Bubble CPAP uses a flowmeter to send pressurized breathing air into a tube connected to a patient's airway with its far end submerged in water. The patient's airway and lungs are thus subjected to a constant hydrostatic pressure that makes breathing easier.
The Beluga ventilator is simply two bubble CPAP systems in parallel. A valve toggles between a high pressure tube, forcing inspiration, and a low pressure tube, allowing for expiration.
Minimum Viable Product
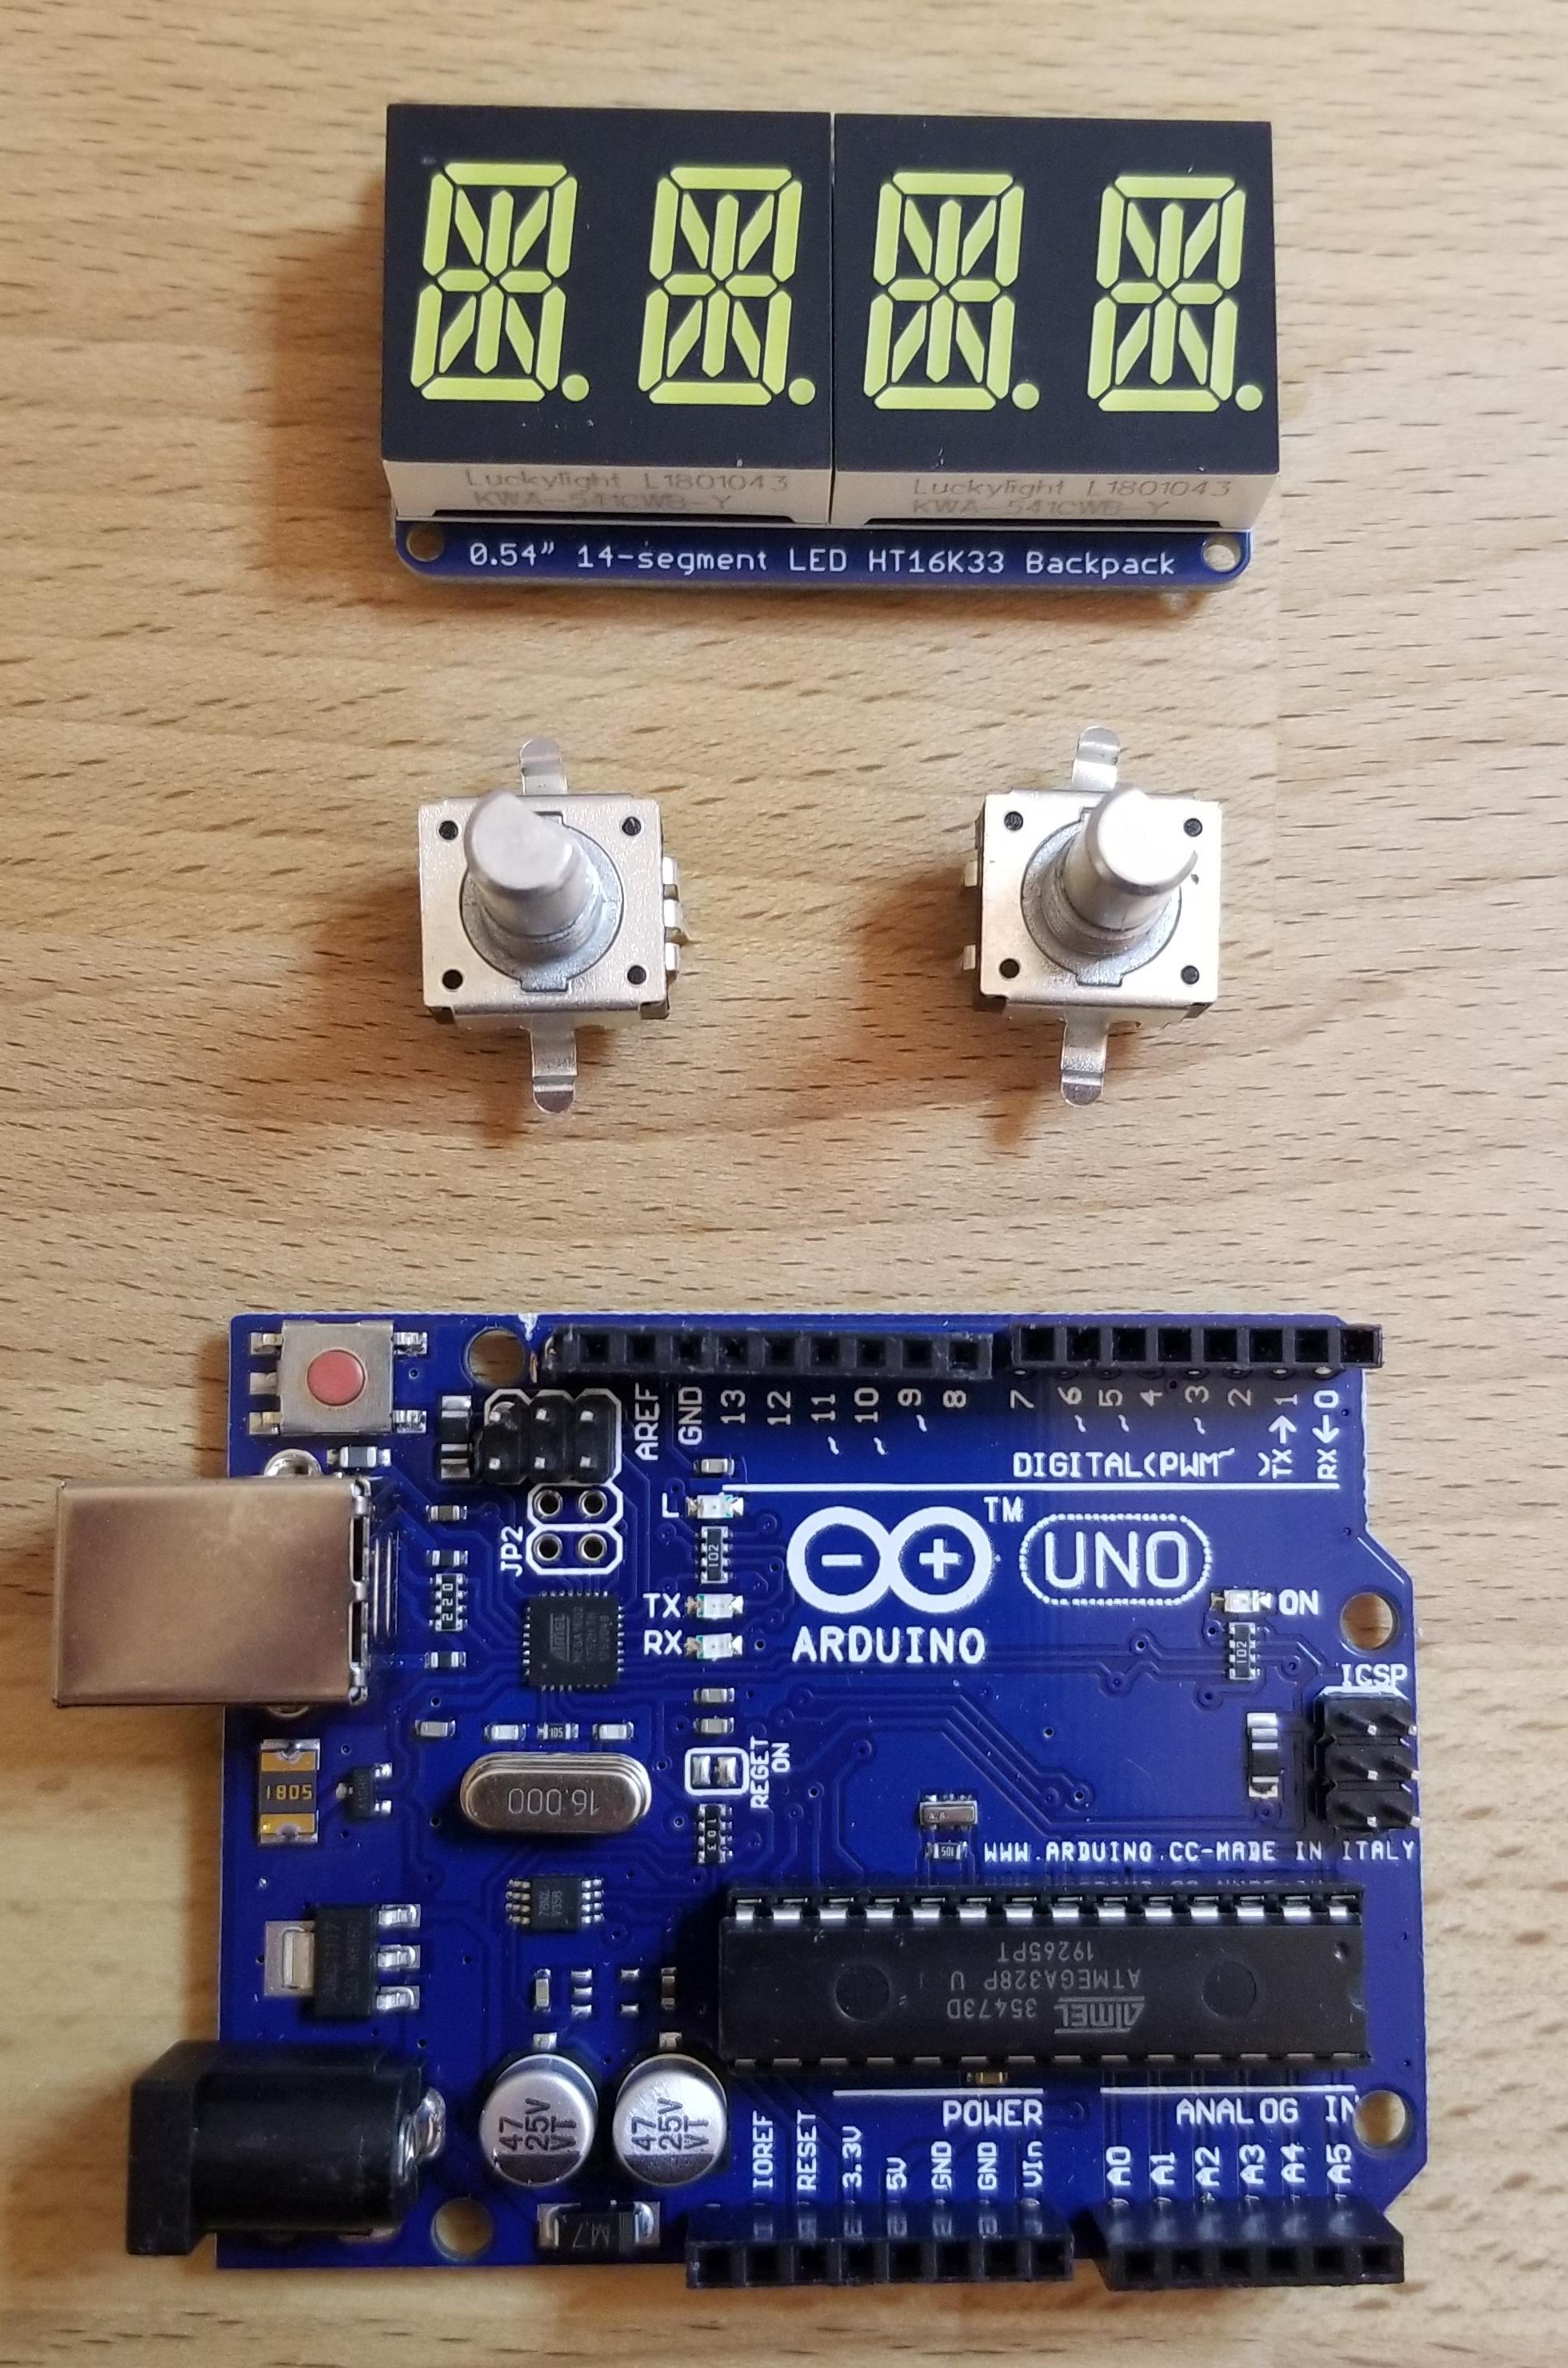
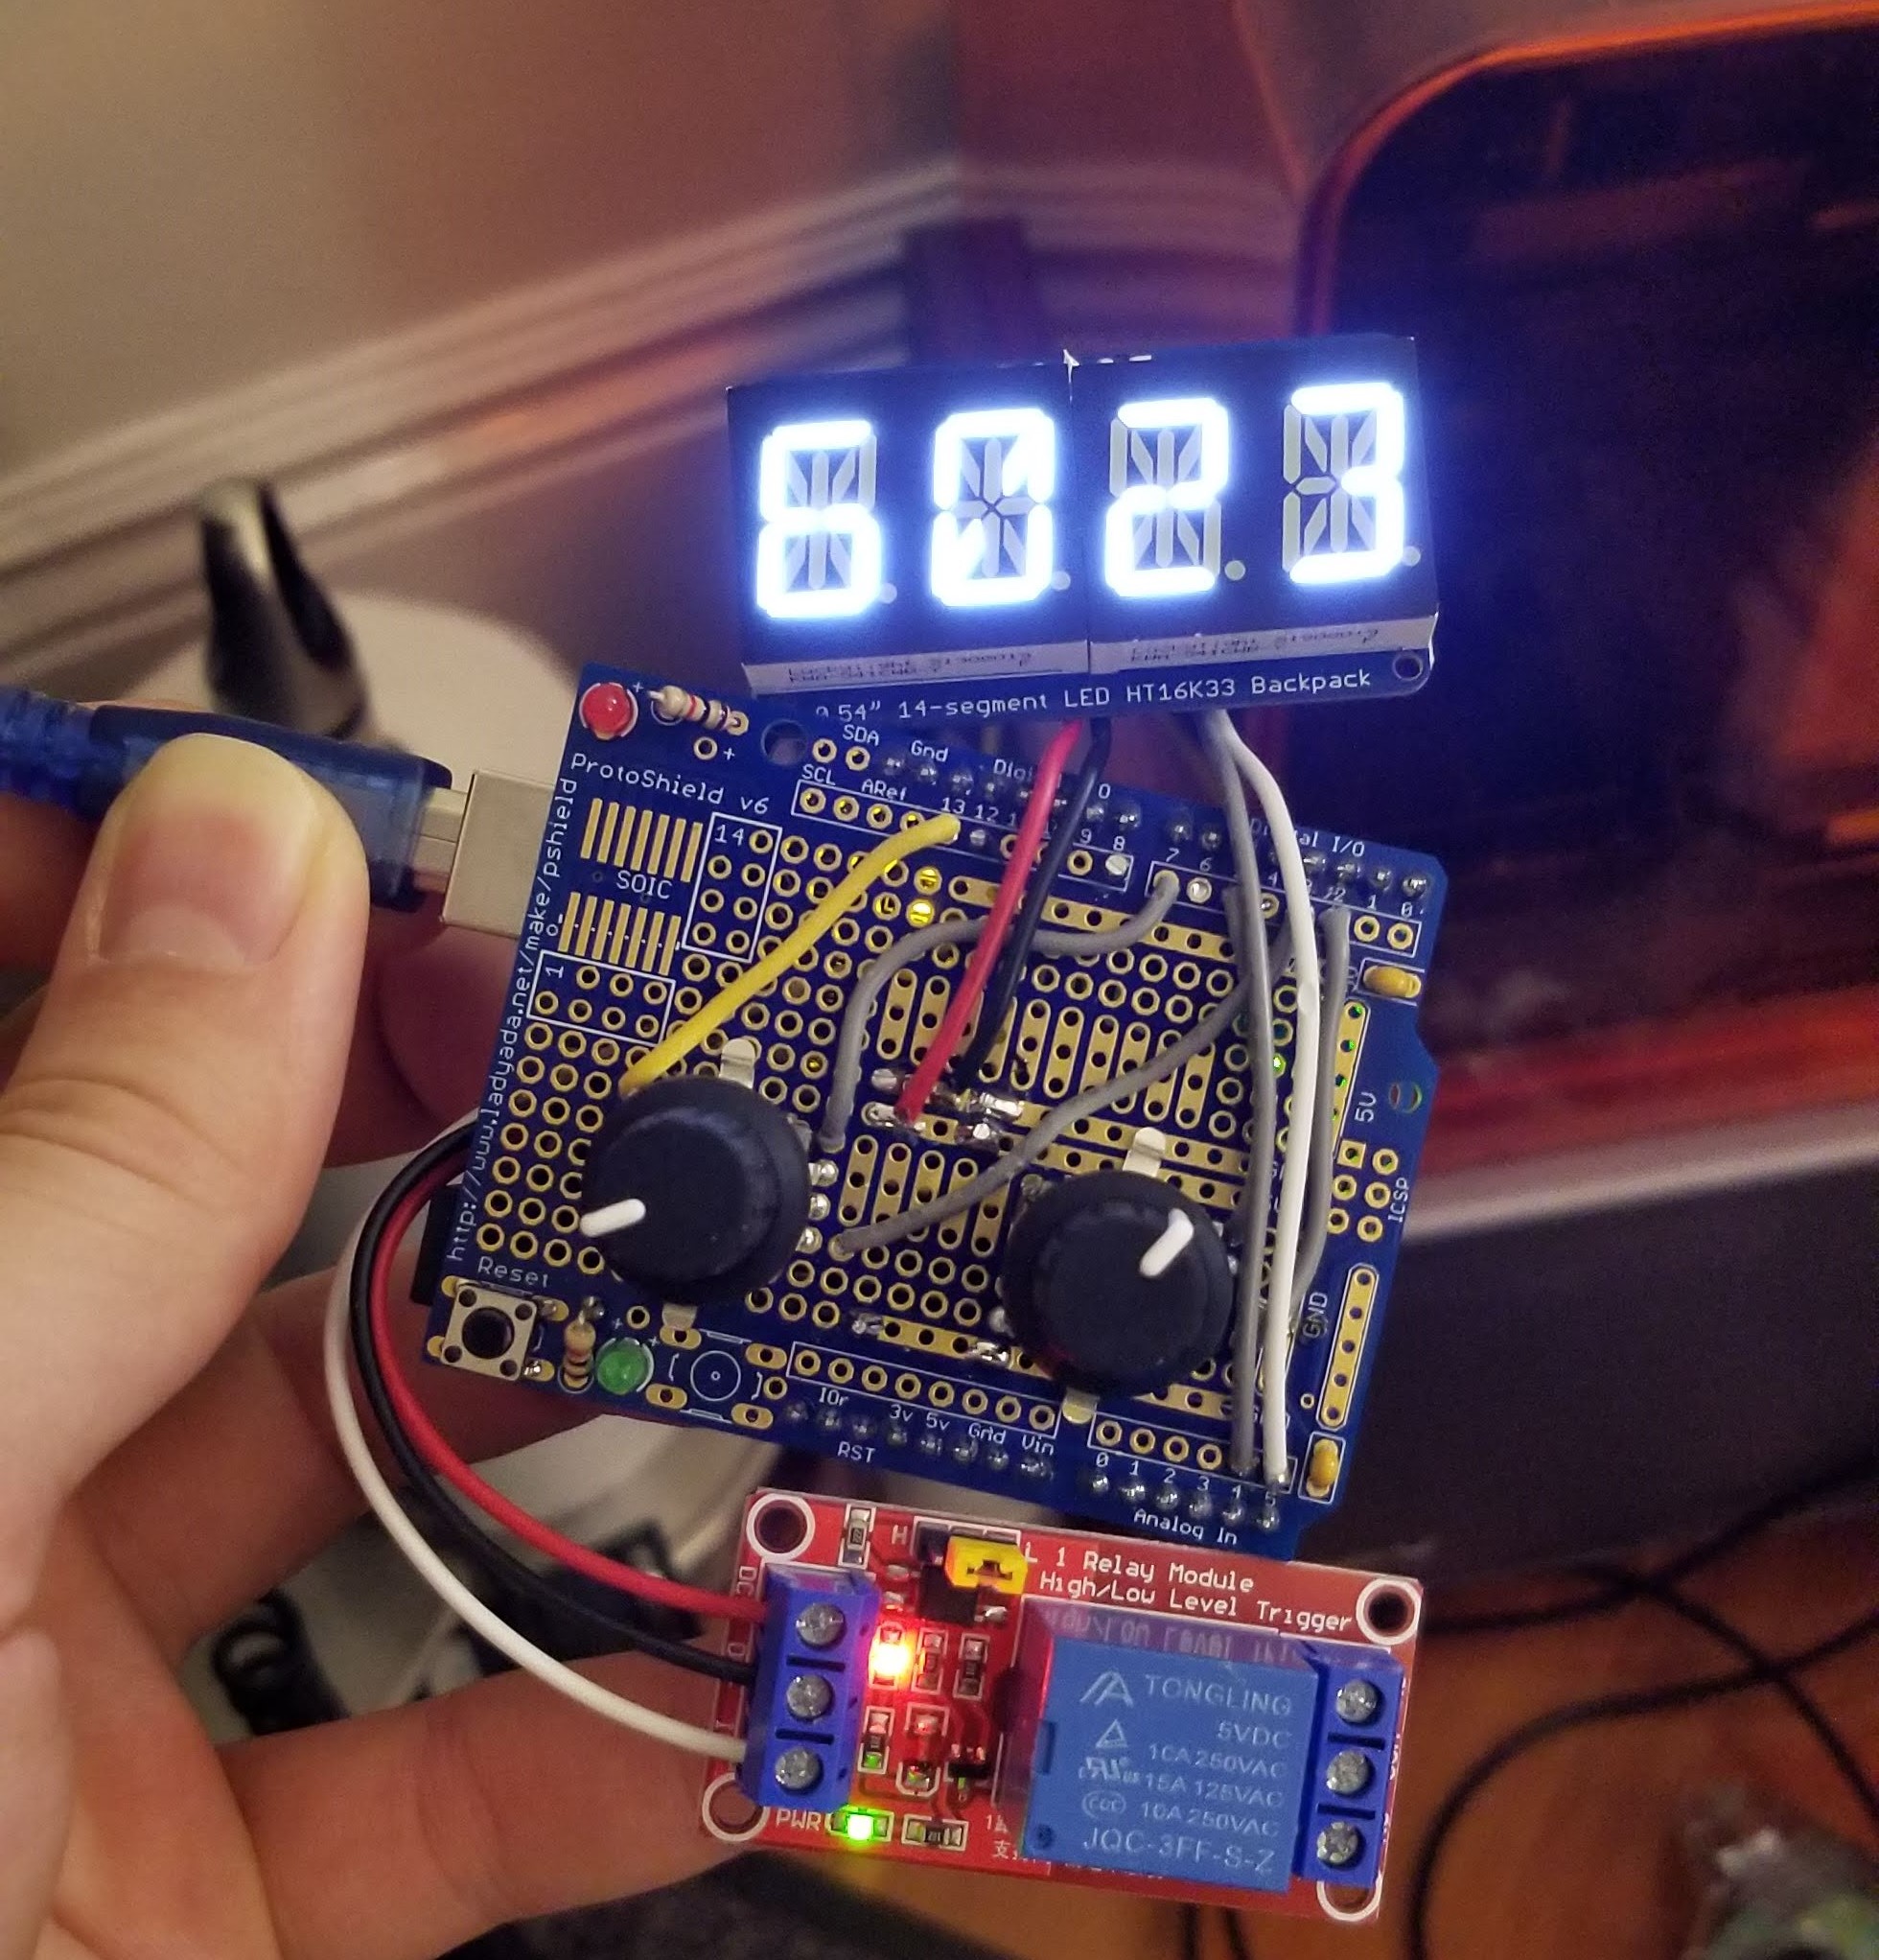
With less than $100 in parts I was able to quickly assemble and program a "valve timer" of sorts to put our core concept to the test. Each knob controls a two-digit input: "RR" or respiratory rate in breaths per minute; and "IE" or a ratio of inspiration time over expiration time for each breath cycle. These two inputs control a relay which opens and closes a large solenoid valve, as seen in the video below. A separate pressure sensor (Honeywell HSC) was added later to enable "pressure support" mode, where a ventilator syncs its behavior to the patient's attempts at breathing on their own (drawing negative pressure from the airway).
Experiments
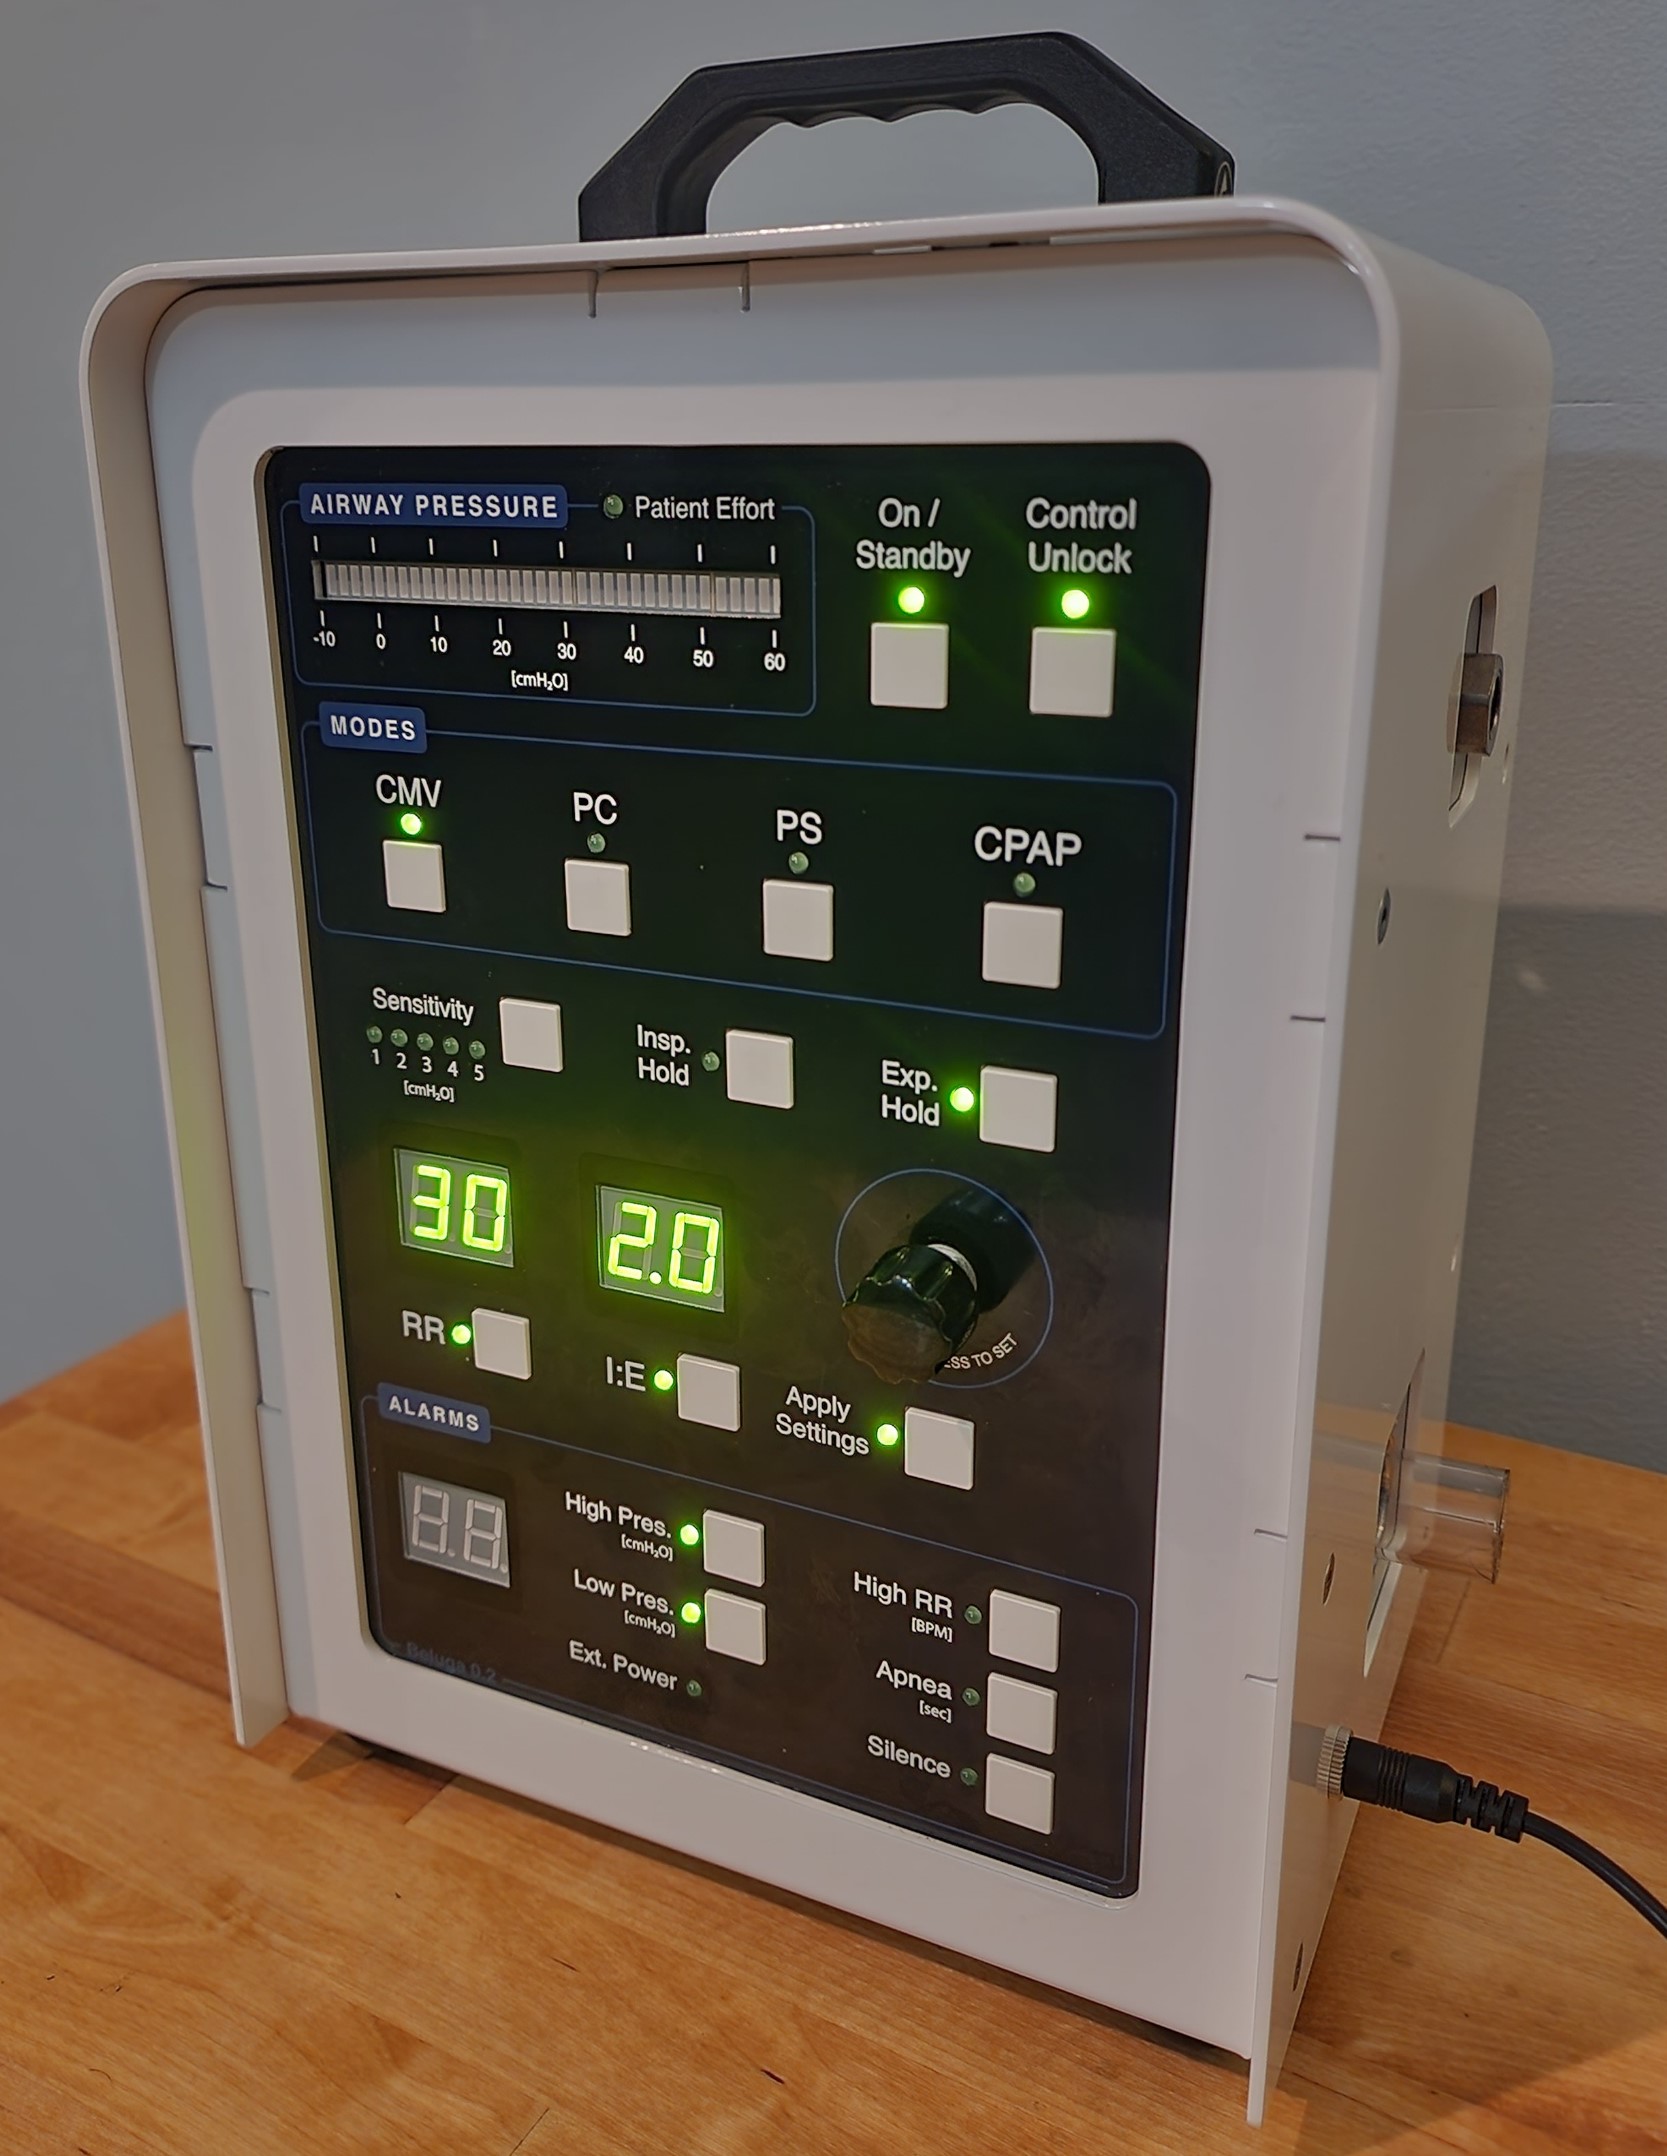
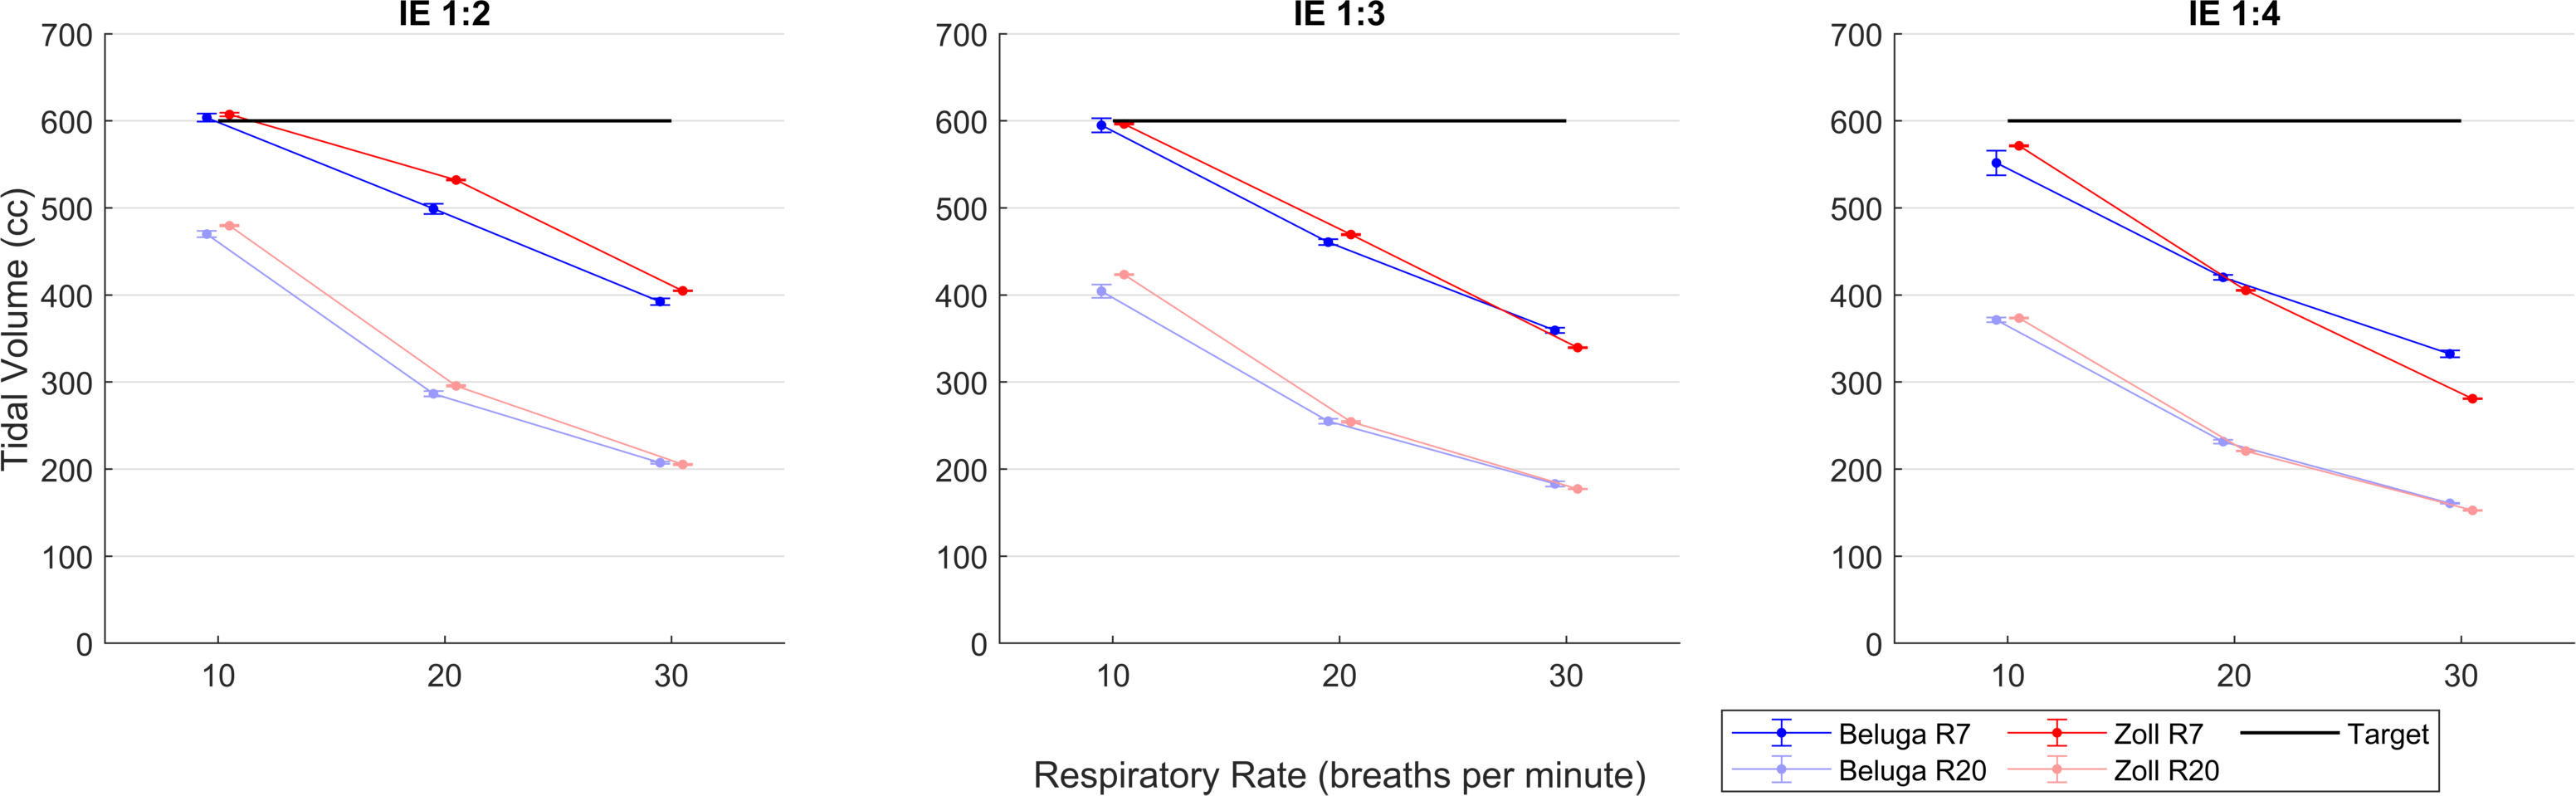
Gopi and Ryan secured space at a lab at MGH with a typical hospital supply of pressurized breathing air. We used an ASL5000 experimental lung device to capture continuous pressure, flow, and lung volume data. We tested our MVP against a popular ventilator designed for rugged, portable use: the Zoll Z-vent. Performance was compared for common ventilator modes of operation (forced ventilation, pressure support), and across an array of parameter combinations (pressure setpoints, lung compliance, airway resistance, flow setpoint, RR, IE, etc). Exemplary data is shown below that supports that our cheap device can compete with such a sophisticated ventilator.
Works-Like Prototype
Our team agreed upon the following priorities for our next prototype:
- Minimize cost and complexity
- Maximize ruggedness and repairability
- Maximize utility, i.e. cover as many patient pathologies as possible
We had started as small/simple as possible with our MVP: one valve, a controller, a user interface, and an enclosure. What could we add to this to bring the most value to bear with the least negative impact on other more important factors? We practiced using the device, studied existing ventilator designs, consulted with experts at MGH, and came up with the following vital improvements.
- Add a second valve upstream of the flowmeter to reduce breathing air usage by 50-80%
- Add a small orifice bypass to the upstream valve to ensure patient does not rebreathe used air
- Integrate a pressure sensor to sense patient breathing and greatly expand the utility of the product
- Include a flowmeter port to enable sophisticated operation algorithms based on the patient's lung expansion/contraction
The basic operation of the device is animated below (sans pressure/flow sensors and bypass orifice).
User Interface
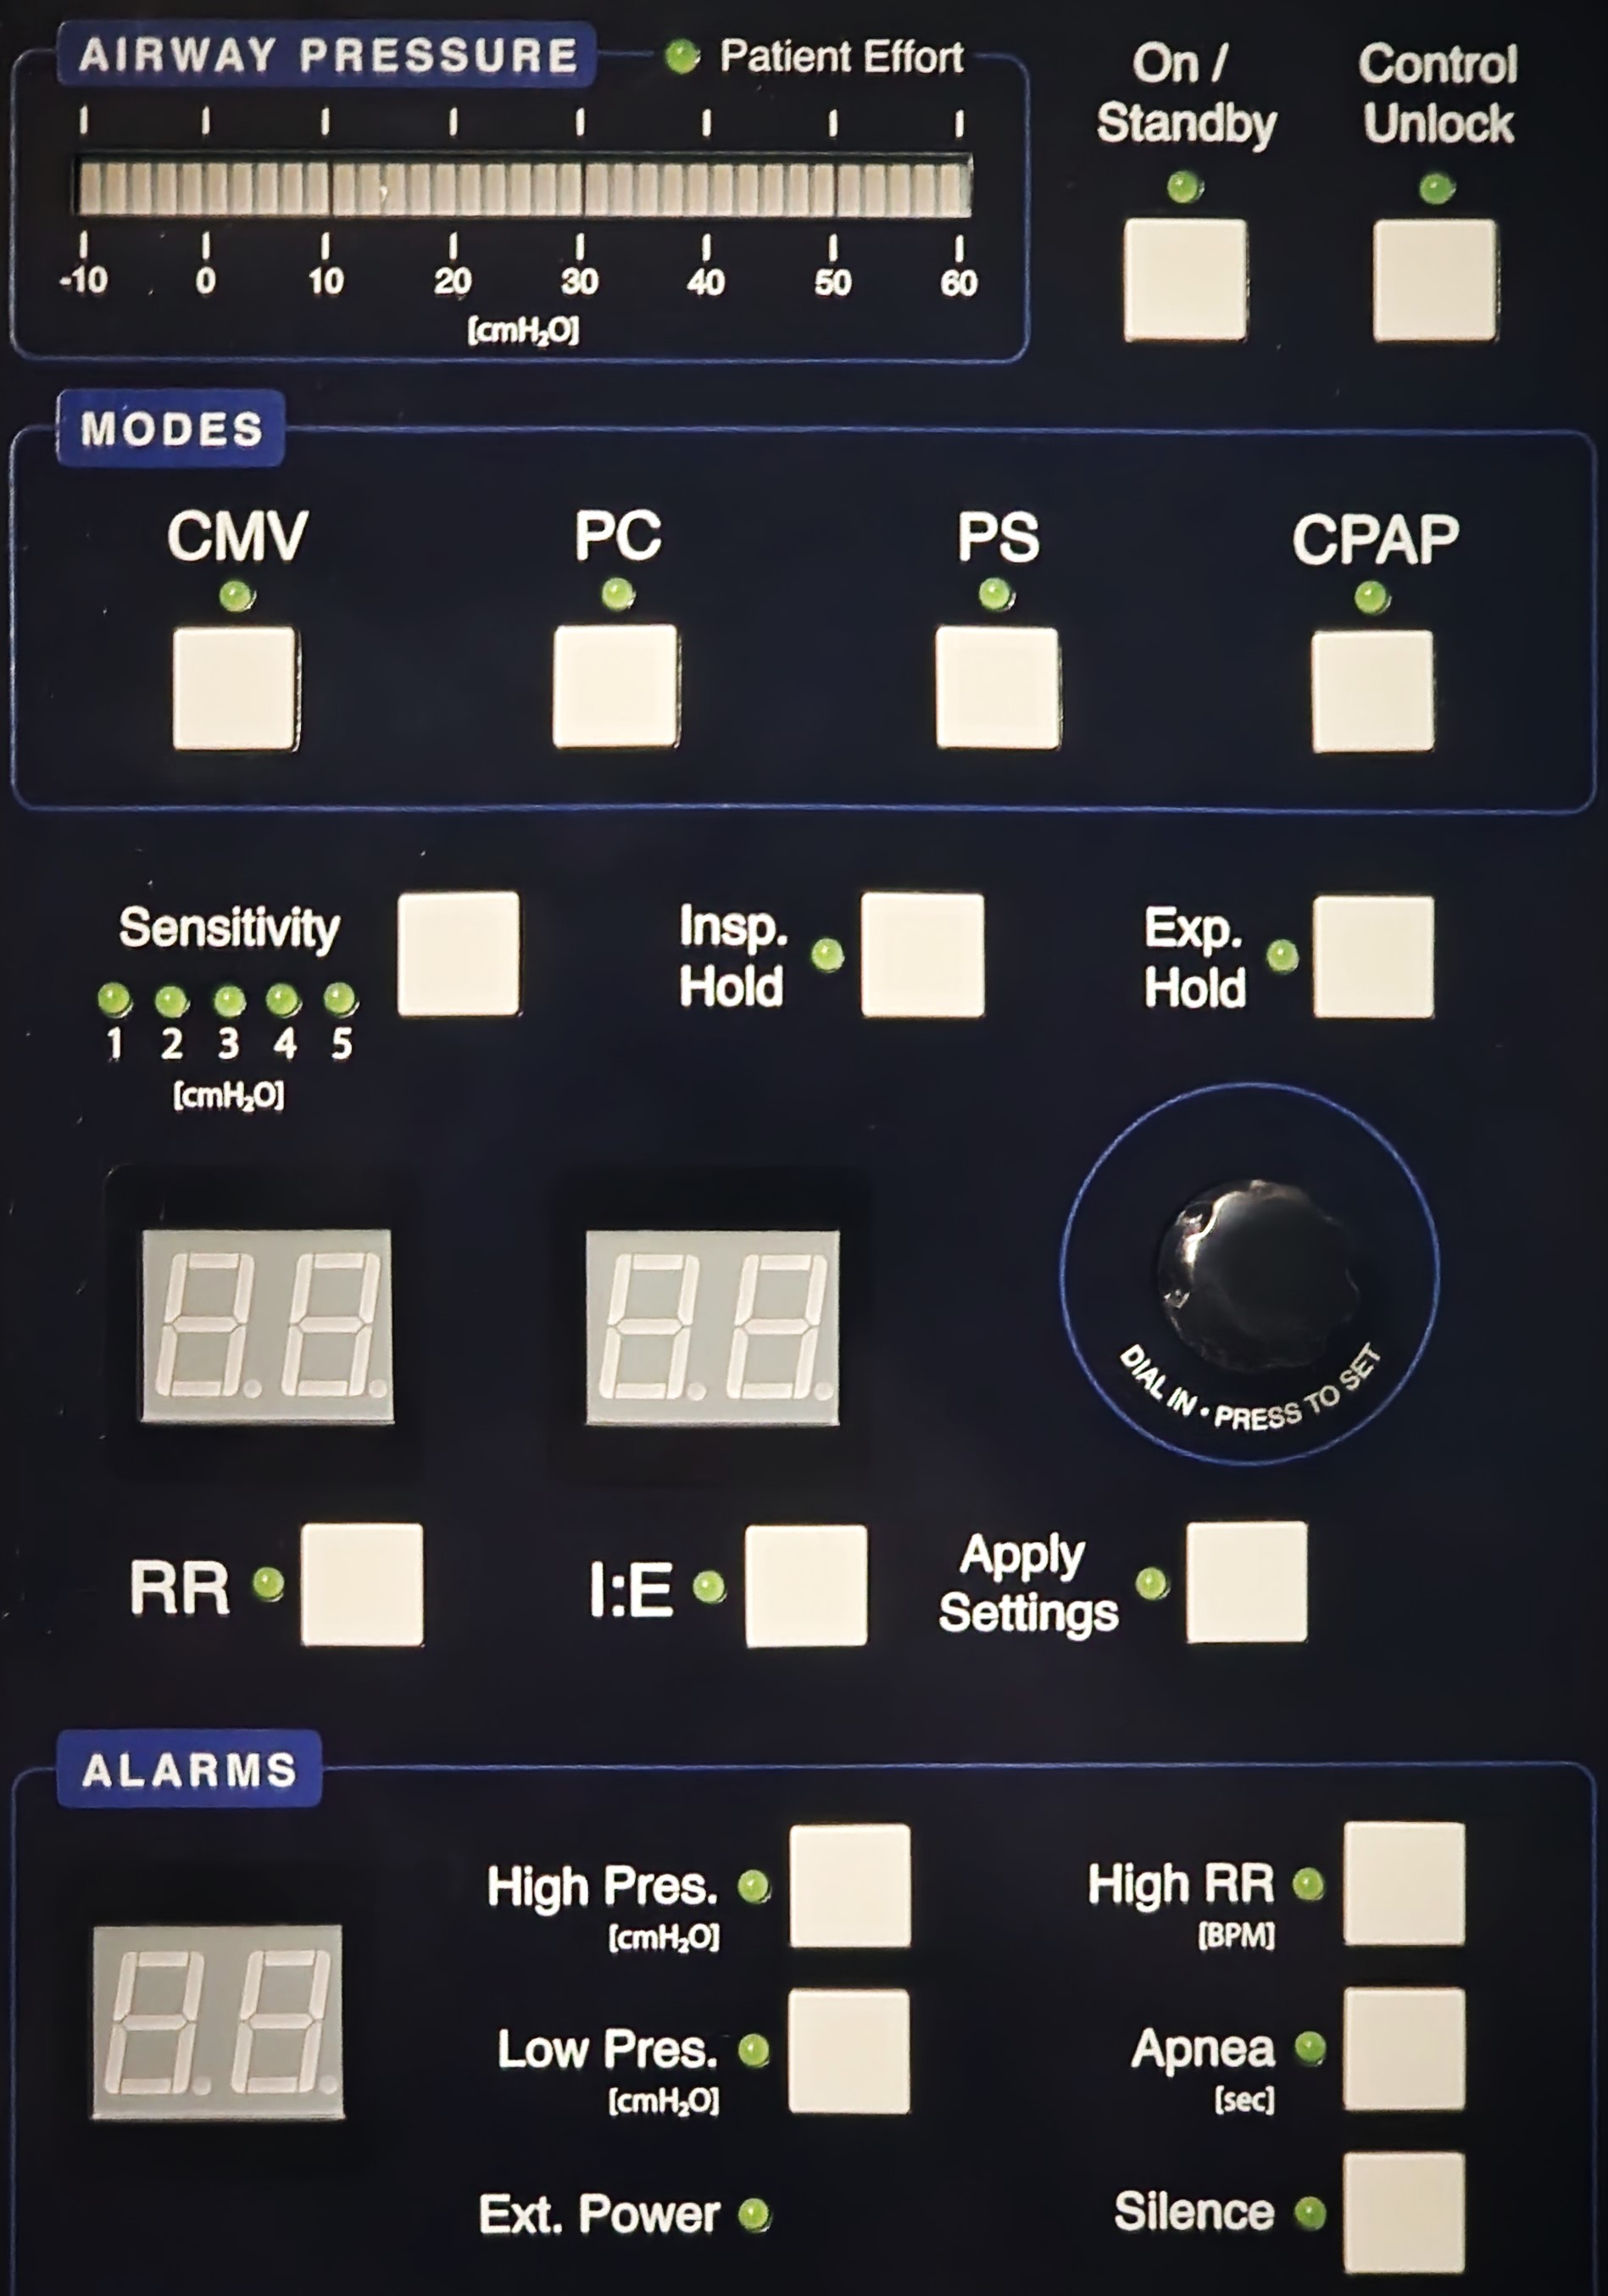
With ruggedness and simplicity in mind, I decided not to allow any hidden elements (e.g. dropdown menus). Every user input has a well-labeled button with plenty of real estate and a distinct LED to call the user's attention precisely where it is needed at any time. Numerical inputs/outputs have seven-segment displays and a shared dial to select the exact number needed. With a detailed description of common ventilator operation modes from my partners at MGH, I started playing with the layout of the many buttons, numerical displays, and LEDs needed to cover every possible use case. I shared physical printouts and powerpoint slides with colleagues at MGH to elicit feedback on UI layout ideas. After many iterations, I worked with Craig Cheney (a talented volunteer EE) to match the PCB layout to my UI specs, select the right components, and design, assemble, and QA the boards.

Controller
I decided to keep the controller and UI PCBs separate so that the more wear-prone UI board would be cheaper/easier to replace. After several meetings to select the best components for my desired functionality, Craig took care of PCB design/assembly/QA to match my mechanical/space requirements, and developed about 50% of the firmware and unit testing needed before handing off to me.
Valve Selection Criteria
Solenoid valves were selected using the below criteria for this prototype.
Safety
- Fail open to allow airflow
- Wetted parts easily cleaned or cheaply replaced for each patient
- Does not create harmful pressure transients
- Attendant can manually actuate device (pinch tubing or override valves manually) while a replacement is swapped
Reliability
- For now, at least 4 weeks of MTBF = ~1.5 million open/close cycles
- Suitable for 100% O2 service and 100% humidity
Other
- Minimal maintenance effort required
- Max 100 ms actuation time
- Upstream CV greater than 0.1, downstream CV greater than 2
- Minimize cost
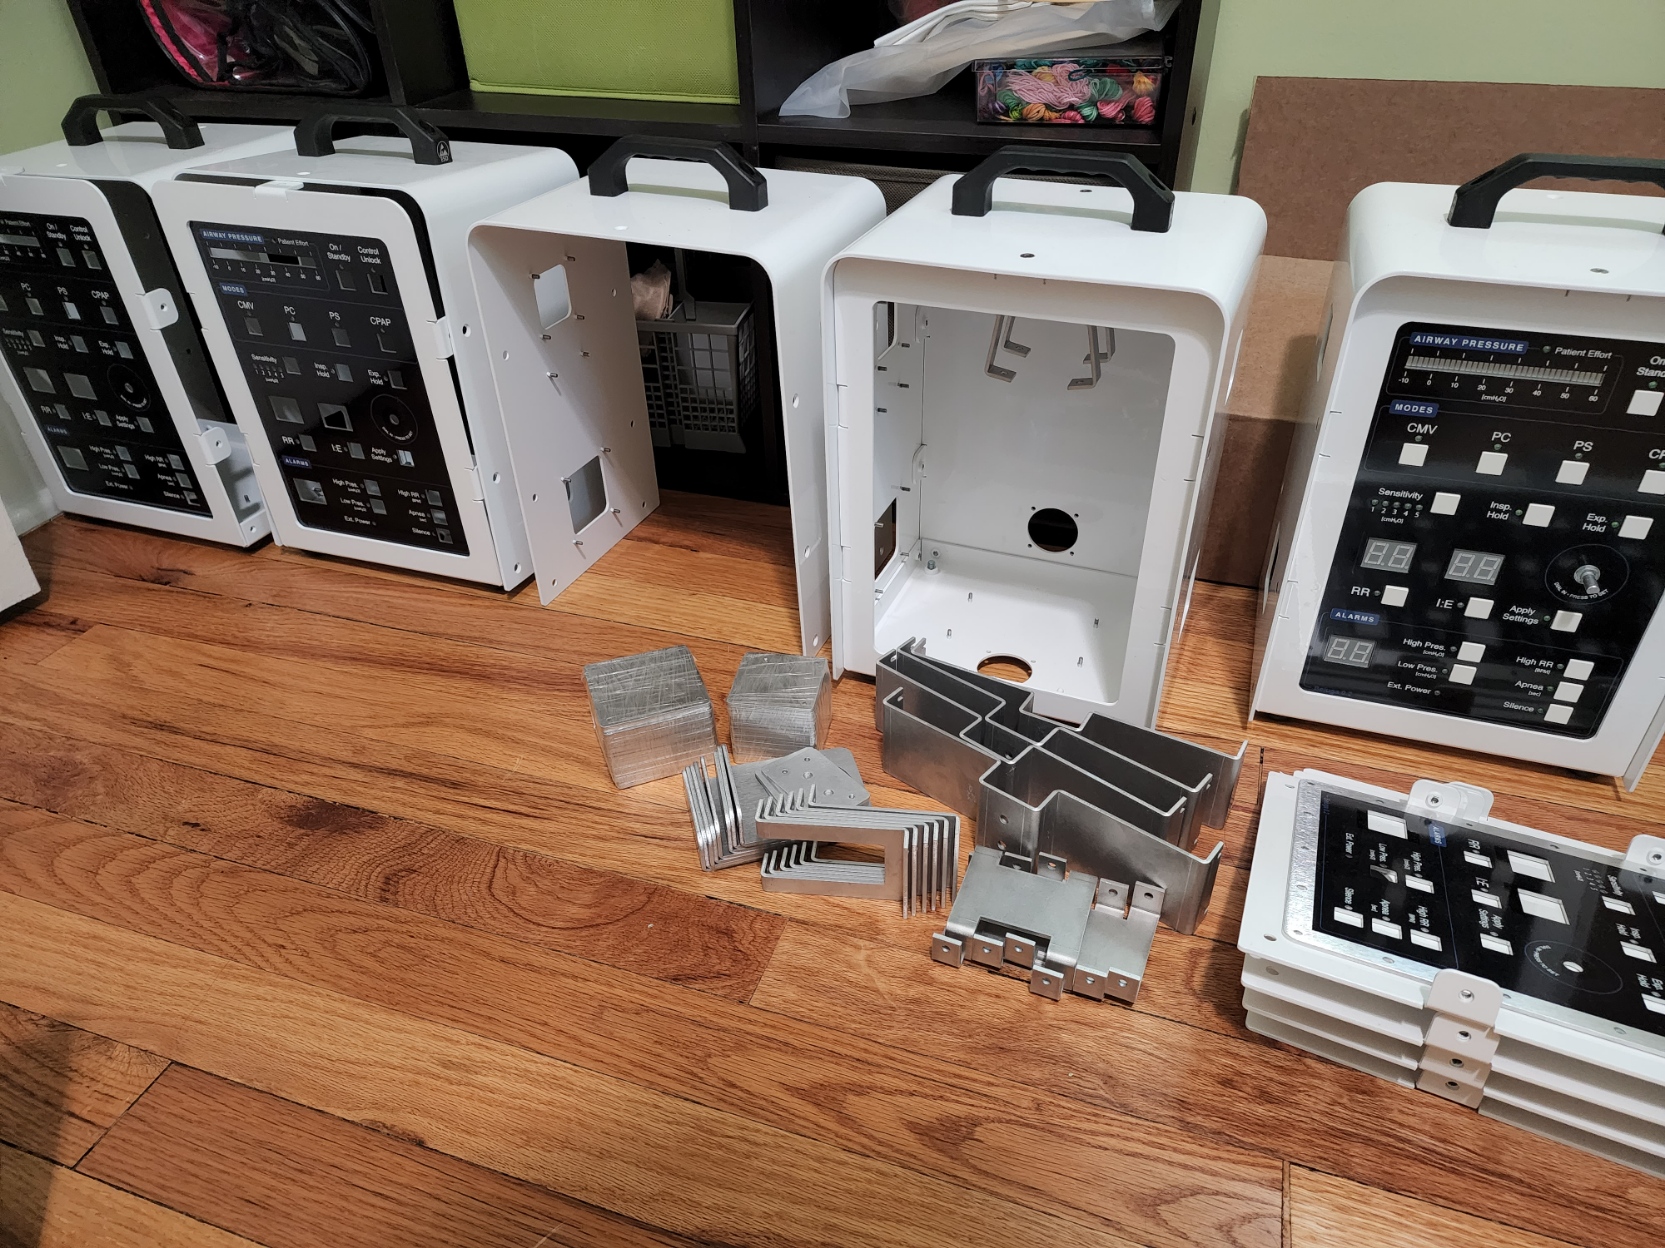
Enclosure
I've experienced enough to know that 'too big' is far better than 'too small' for an enclosure, so ample space was planned for all internal components. I decided on a full sheet metal build for durability and design flexibility (minimal tooling costs). PEM fasteners were the star of the show here, allowing for quick, easy assembly of most internal components. A recessed front panel shields UI elements from damage should the vent fall on its face. 40mm fan holes and ventilation holes allow for active cooling of the solenoid valves and PCBs. Otherwise, for now we just need a box to look like a vent and act like a vent so we can learn as much as possible. Later designs will consider medical device standards and cater to Uganda's local manufacturing capabilities.

I am now finishing the firmware and software development and will be sending out the first complete prototypes soon!
Future Work
Once all 5 prototypes have been assembled, programmed, and tested, I will send out 2x to my MGH collaborators for feedback. Any immediate software/firmware learnings will be fixed before sending 2x units to our collaborators in Uganda. Meanwhile, I will continue to work on a more optimal valve design/selection, including but not limited to the valves shown below.